Example Wine Cellar Projects in Beaverton

Each example walks through one cellar, from the house and the space it uses to the build, the cooling, the time it takes and about what it would cost. Five of the six houses were built between the 1960s and the 1990s, and nearly two-thirds of Beaverton homes date from those four decades.

These are examples, not past jobs, clients or addresses. Each one draws on when Beaverton houses were built, what each kind of cellar takes to build and current prices, to show where a project like yours might land before you ask for a quote.

Open label-forward wine wall in a 1980s dining room

Example project
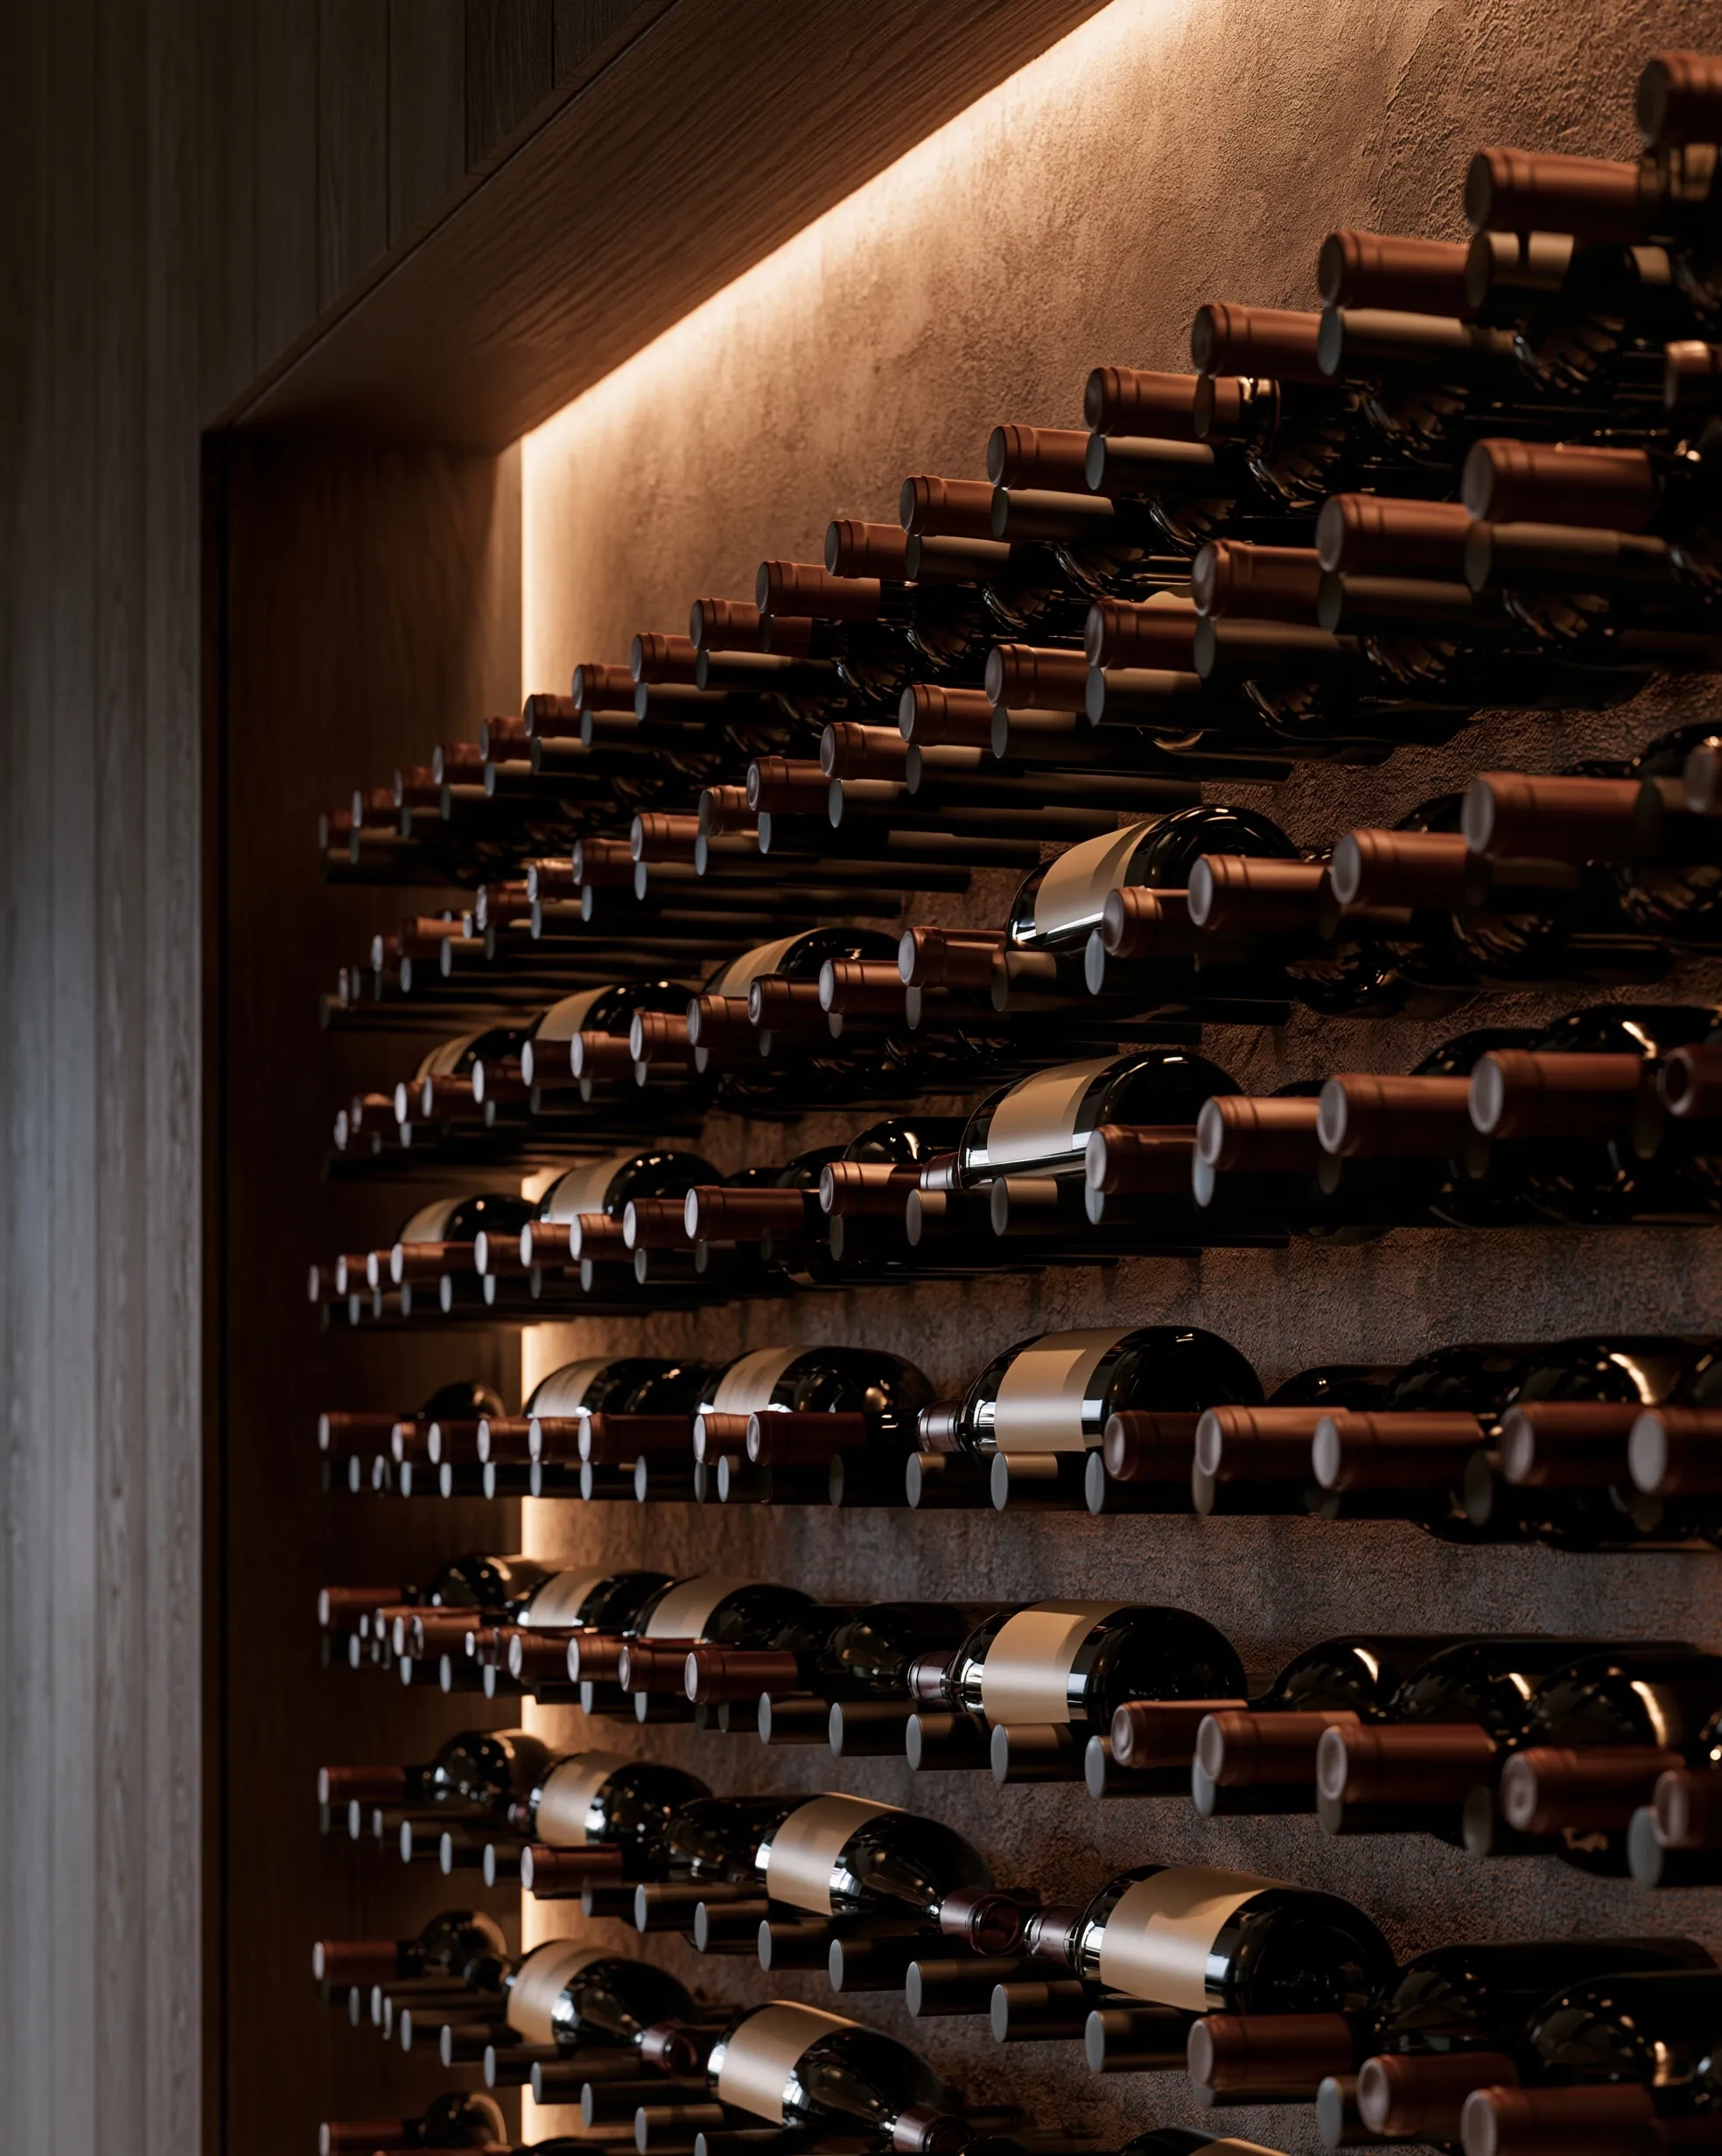
Wine bottles held label-out on rows of metal pegs across a plaster wall, inside a wood-framed niche lit along the top
Home
1980s two-story house with a separate dining room
Original request
Put the wine the family drinks week to week on show in the dining room
Space
An alcove that held built-in shelves, about 7 ft wide
Design
Metal pegs holding bottles label-out on a plaster back wall, dark wood trim around the opening, an LED strip under the head
Capacity
About 200 bottles
Cooling
None, because the wall holds wine for drinking within a few months
Timeline
Three days on site after a three-week wait for the pegs
Estimated cost
$7,200

Scope of work

Old shelves out, the back wall skimmed with plaster, metal pegs fixed into the studs in rows, dark wood trim around the opening, an LED strip under the head on a wall switch, and touch-up paint.

Project overview

In this example, the owners of a 1980s house drink most of what they buy within a few months. They want those bottles in the dining room, where guests can see them, instead of in boxes in the garage.

Because the wine is for drinking soon, the alcove needs no cooling, door or insulation, which keeps the cost low. The pegs hold each bottle on its side with the label facing out, and the light sits behind the trim so it washes the wall rather than shining into the room.

The goal

The goal is a wall of about 200 bottles that the family drinks from every week, on show in the dining room, for a small part of the cost of a cooled wine wall.

Process

  1. Design Alcove measured and peg rows spaced for standard bottles, with a few wider rows for Champagne.
  2. Ordering Pegs and trim ordered, about three weeks.
  3. Day one Shelves removed, back wall skimmed, wiring run for the light.
  4. Day two Pegs fixed into the studs and the trim fitted.
  5. Day three Light connected, paint touched up and the bottles loaded.

Planning right

  • Keep an open wall away from a sunny window, a heat vent or the back of an oven.
  • Fix the pegs into studs or solid blocking. A full row of bottles is heavier than it looks.
  • Pegs show every label but hold fewer bottles per foot than bins.
  • Wine you want to keep for years belongs in a cooled cellar, not on an open wall.
Request a free quoteMore about custom wine walls

Basement cellar with a stone tasting bar in a 1970s house

Example project

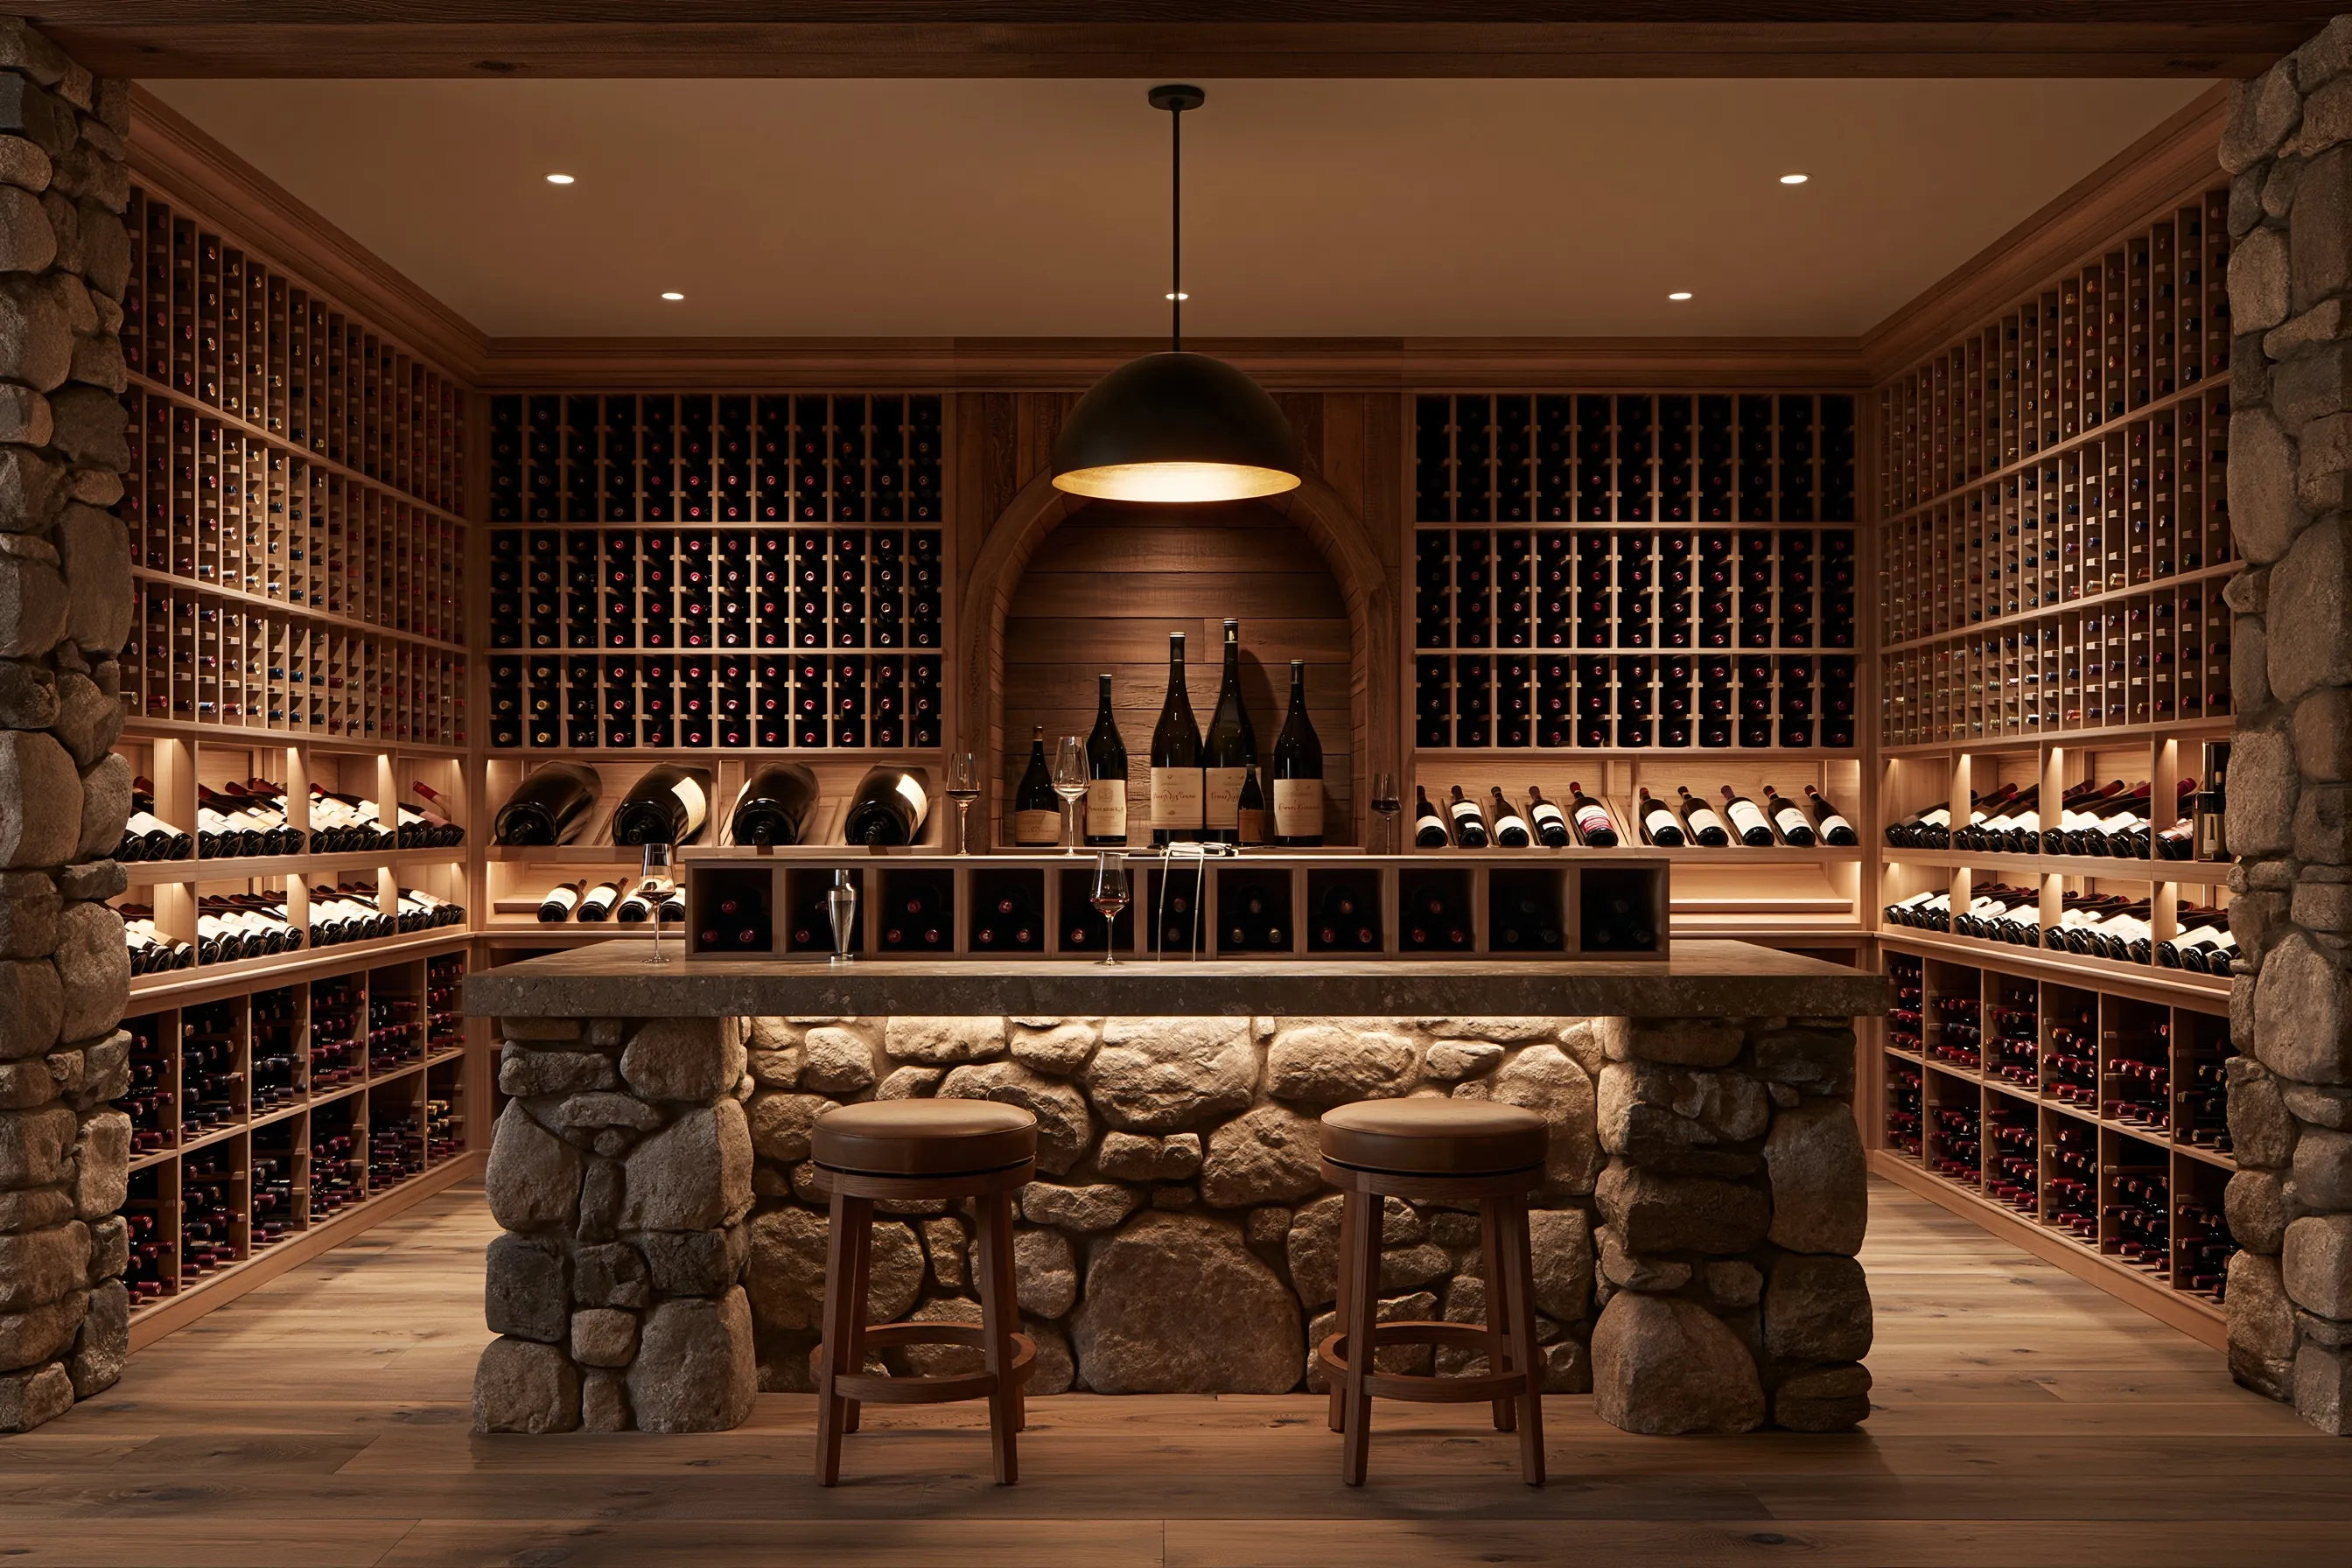
Large cellar with wood racks on three walls, rough stone piers, a stone tasting bar with two stools and an arched niche for large bottles
Home
1970s two-story house with a full basement
Original request
Room for about 2,000 bottles and a bar to taste at with friends
Space
Basement rec room, about 13 by 13 ft (about 170 sq ft)
Design
Wood racks with single-bottle slots, lit display shelves, an arched niche for large bottles, a stone-faced tasting bar and stone-veneer piers
Capacity
About 2,000 bottles
Cooling
Split system; the outdoor part sits on a pad at the side of the house
Timeline
Seven weeks on site, inside sixteen to twenty weeks from first drawing to start-up
Estimated cost
$92,000

Scope of work

Damp readings on the foundation walls and the slab, framing set an inch off the concrete, insulation and a vapor barrier on the warm side, an insulated exterior-grade door, wood racking with slots, display shelves and an arched niche, a stone-faced bar and stone-veneer piers, a wood floor over the sealed slab, low-heat lighting with the pendant on a dimmer, and a split cooling system with its own circuits and a drain.

Project overview

In this example, the owners of a 1970s house have a basement rec room they hardly use and a collection that has outgrown two wine fridges. They want a cellar for about 2,000 bottles, with a bar where friends can stand and taste.

At this size the work starts with water. The walls and slab are checked for damp after a spell of heavy rain, and the new walls stand an inch off the concrete so air can move behind them. The stone is a veneer on framed piers and on the bar front, so it looks like an old cellar while the walls behind it stay insulated. A split system puts the noisy part outside, which keeps the bar quiet.

The goal

The goal is a basement cellar holding about 2,000 bottles near 55°F, with a stone bar to taste at and no machine noise in the room.

Process

  1. Before design Damp readings on the walls and slab, taken after heavy rain.
  2. Design Racks, bar and niche drawn, and the cooling sized for the room and its concrete floor.
  3. Weeks one to three New walls framed clear of the concrete, then wiring, the line set, insulation and vapor barrier.
  4. Weeks four and five Wall finish, floor, stone veneer and the bar.
  5. Weeks six and seven Racks, door and lights, then the split system set and started.
  6. First week The room is brought down to about 55°F slowly before the bottles move in.

Planning right

  • Damp walls or a damp slab mean drainage work comes before any framing. A cellar wall only hides the water.
  • Stone veneer on framed piers gives the look of old masonry without leaving bare concrete in the room.
  • A pendant over a bar adds heat. Put it on a dimmer and a switch by the door.
  • The outdoor part of a split system needs a level pad away from bedroom windows.

Request a free quoteMore about basement wine cellars

Wine closet in a walk-in pantry beside a 1990s kitchen

Example project

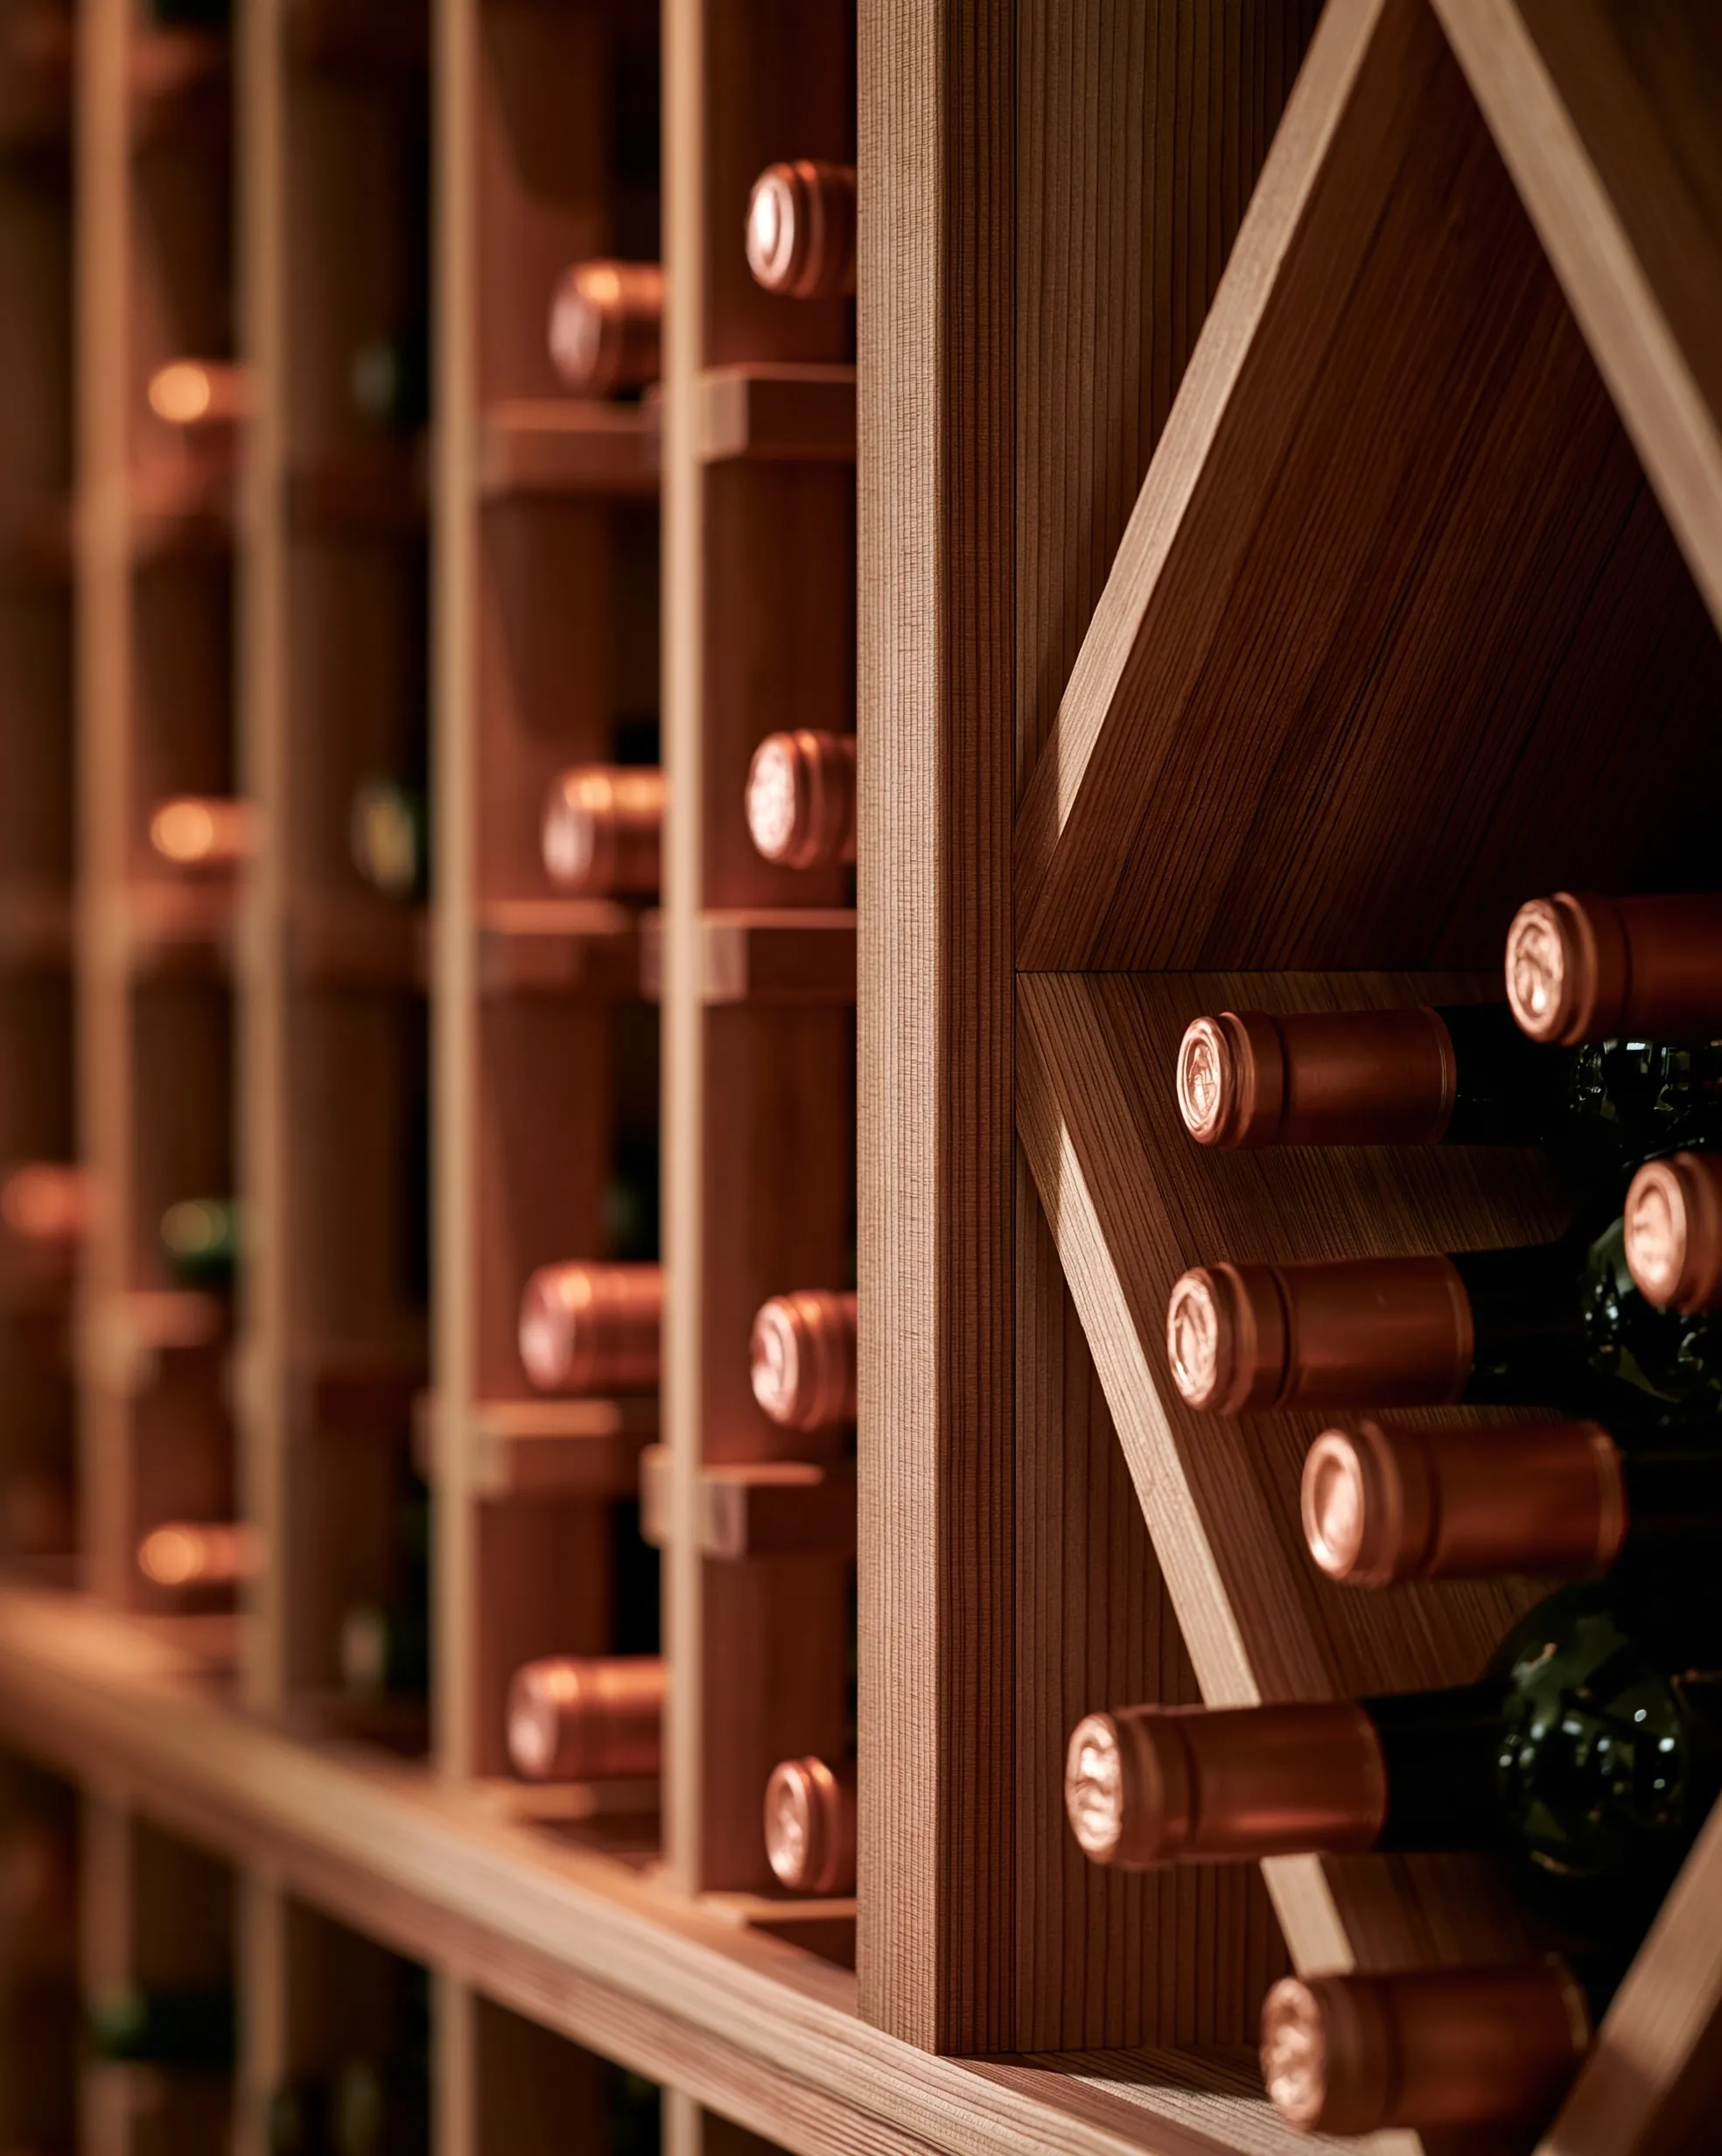
Close view of light wood wine racks with single-bottle slots beside a diamond bin stacked with bottles
Home
1990s two-story house
Original request
Turn the walk-in pantry beside the kitchen into a cooled wine closet
Space
Walk-in pantry, about 5 by 6 ft, sharing a wall with the family room
Design
Light wood racks with single-bottle slots, diamond bins for cases, an insulated solid door
Capacity
About 400 bottles
Cooling
A through-the-wall unit, its warm side opening into the family room
Timeline
About three weeks on site
Estimated cost
$17,000

Scope of work

Food shelving cleared out of the 5 by 6 ft pantry, racks with single slots on three walls and diamond bins for cases, insulation and a vapor barrier behind new drywall, pipes and outlets sealed, a solid insulated door, a unit set in the shared wall with its warm side in the family room, a drain and a dedicated circuit, a low-heat light and paint.

Project overview

In this example, the owners of a 1990s house want to keep about 400 bottles near 55°F, and the walk-in pantry next to the kitchen is the only space they can spare. It shares a wall with the family room, which is far bigger than the pantry and stays cool enough to take the unit's warm air.

The pantry already has walls and a door opening, so most of the work is sealing it. The walls and ceiling are insulated, the door is replaced, and every outlet and pipe through the walls is sealed. Single slots hold the bottles opened one at a time, and the diamond bins take wine bought by the case.

The goal

The goal is a former pantry that keeps about 400 bottles near 55°F a few steps from the kitchen, with the unit's warm air going into a room that can take it.

Process

  1. Design Pantry measured, racks drawn, and the unit chosen for the room size and the family room it vents into.
  2. Week one Pantry emptied and the unit opening cut, wiring, then insulation, vapor barrier and drywall.
  3. Week two Racks and diamond bins fitted and the new door hung.
  4. Week three Unit set and connected, light fitted, paint and start-up.

Planning right

  • A through-the-wall unit needs a large room on its warm side. Another closet or the garage will not do.
  • Keep the family-room side of the unit clear of furniture and curtains.
  • Diamond bins hold more bottles per foot than single slots, but a single bottle is harder to find in a bin.
  • Food goes somewhere else for good. A door opened all day lets warm air in.

Request a free quoteMore about closet wine cellar conversions

Small cellar behind a glass door in a 2000s front hall

Example project

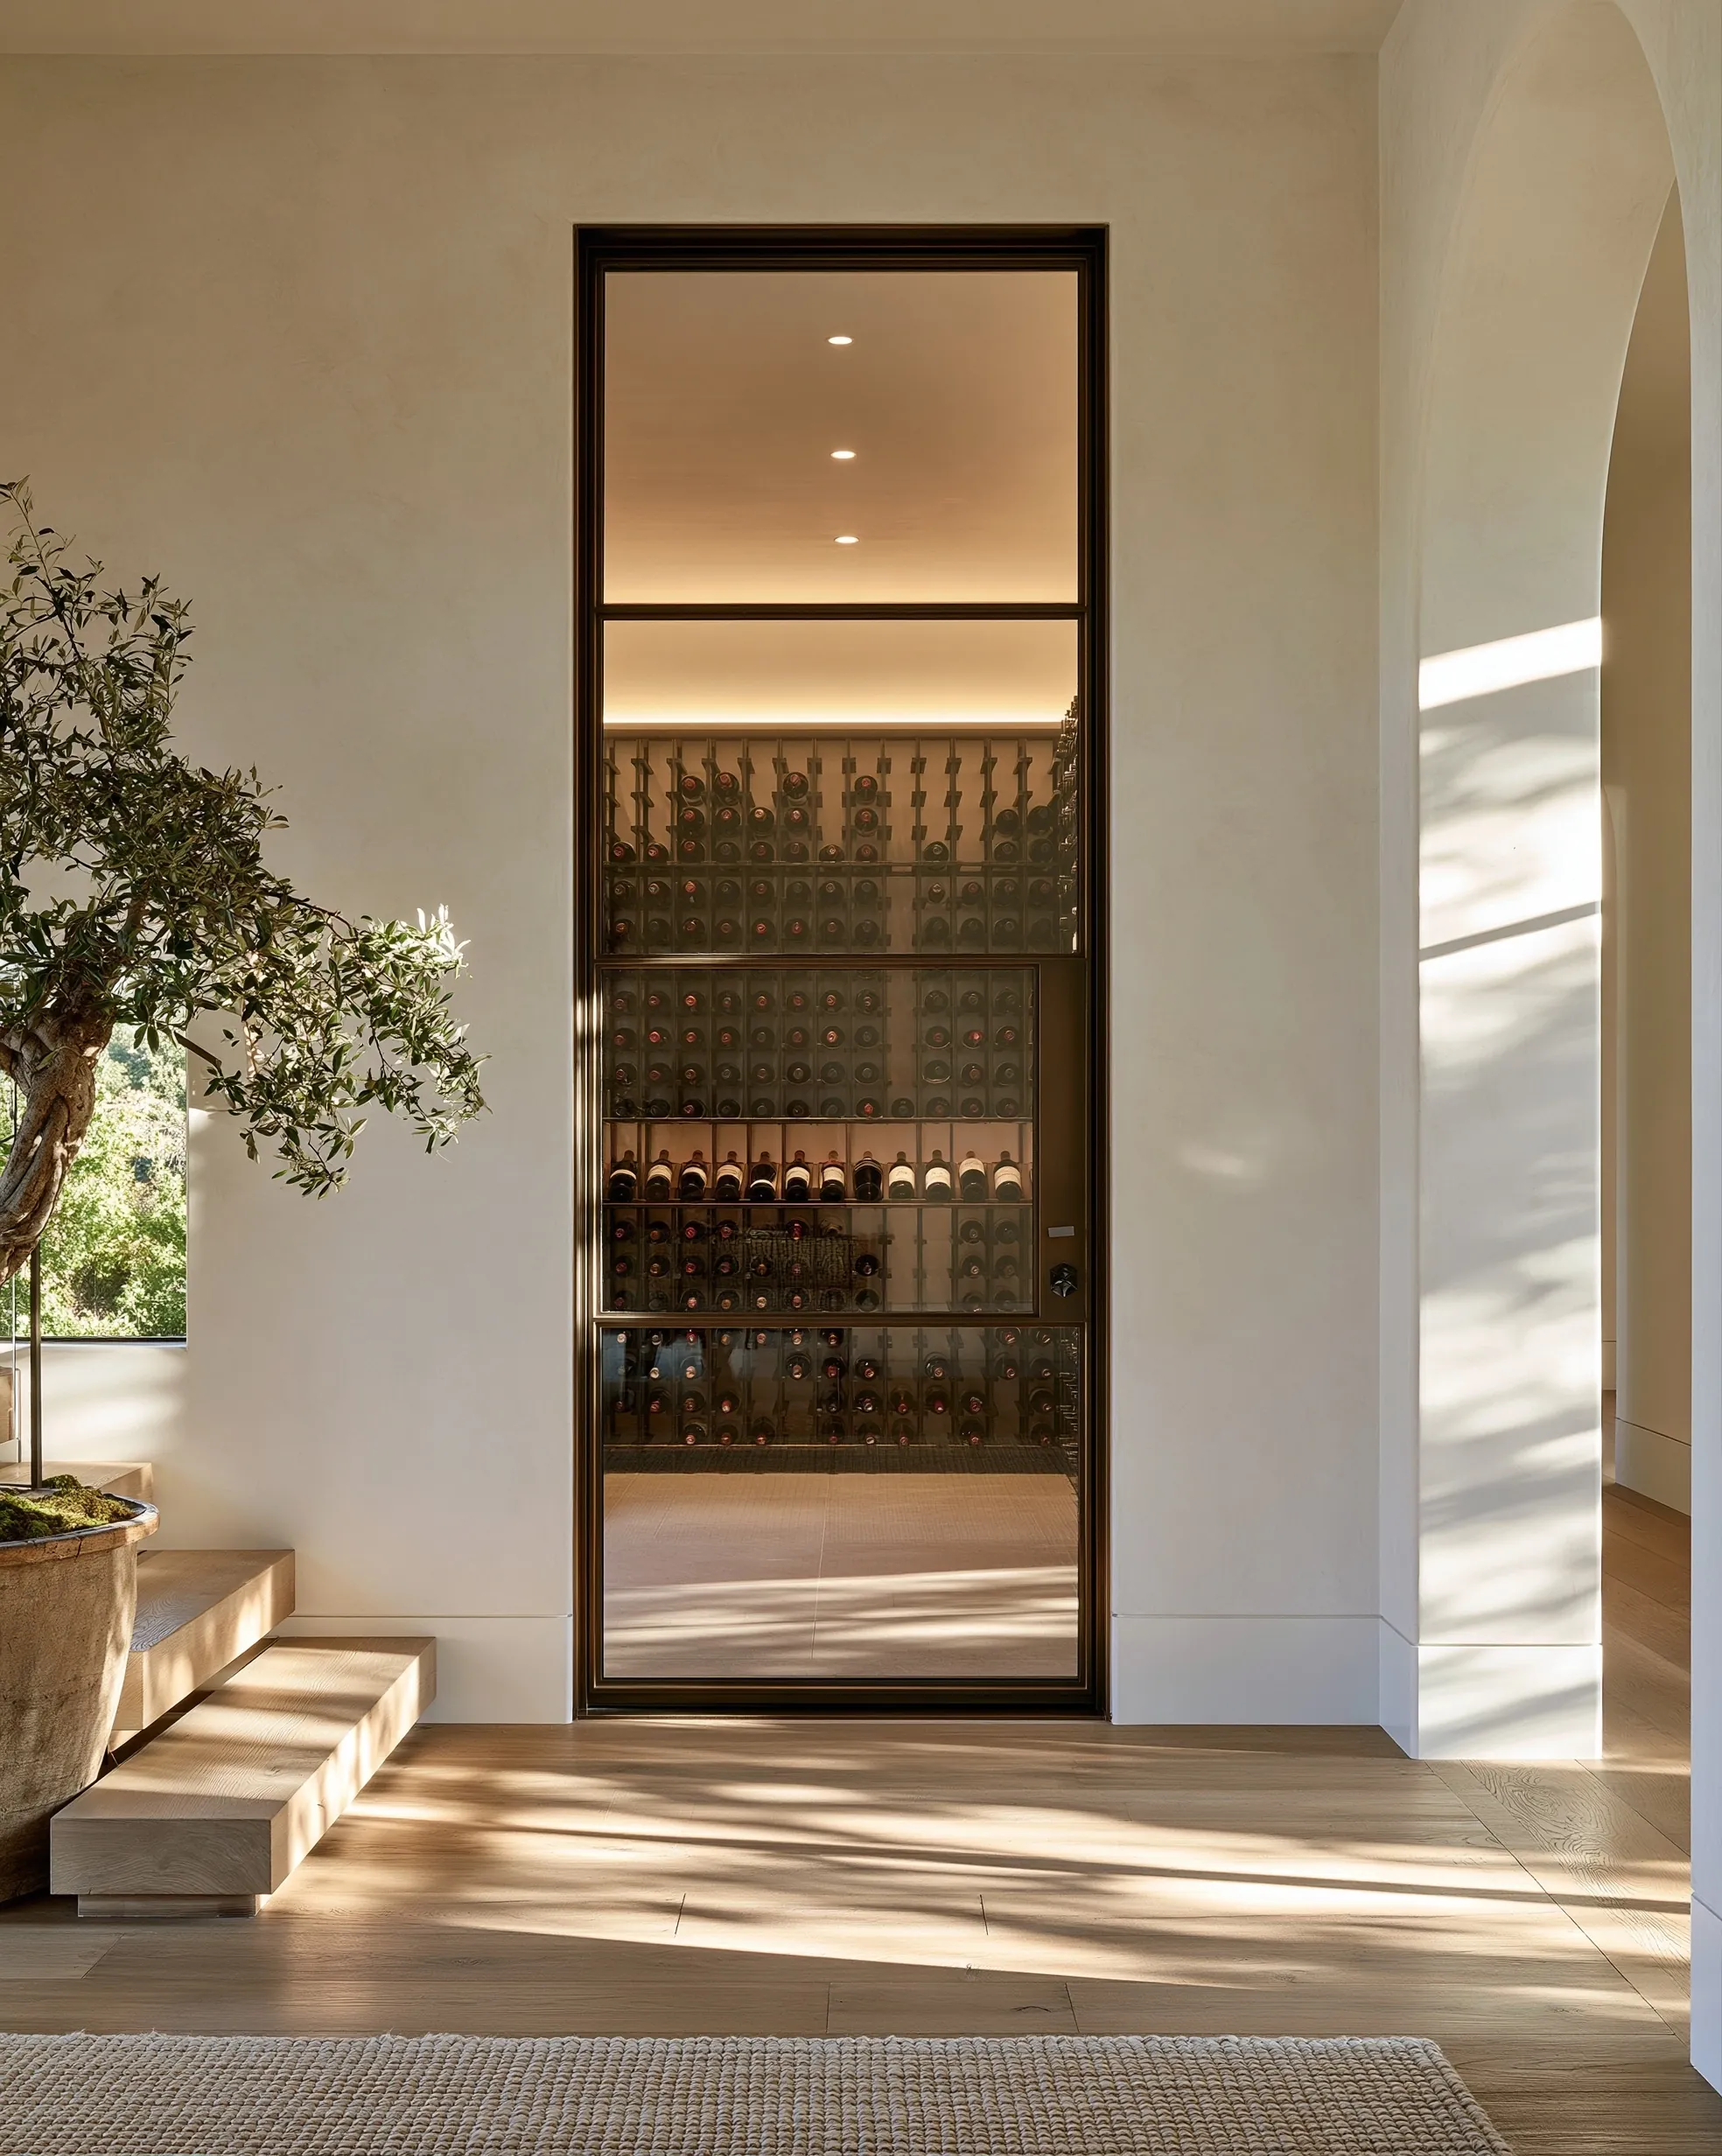
Tall steel-framed glass door in a white plaster wall, opening onto a small lit wine room with bottles on metal pegs
Home
2000s two-story house with an open front hall
Original request
A small cellar off the front hall, with the bottles on view through a glass door
Space
Coat closet and the dead space behind it, about 4 by 6 ft
Design
A tall steel-framed door with insulated glass, metal pegs on the back wall, a lit shelf for standing bottles, plaster walls to match the hall
Capacity
About 200 bottles
Cooling
A small split system, its outdoor part next to the garage
Timeline
Three weeks in the house, after about eight weeks waiting for the glass door
Estimated cost
$22,800

Scope of work

The coat closet opened into the space behind it and reframed, insulation and a vapor barrier on the walls and ceiling, a tall steel-framed door with insulated glass and seals on all four sides, metal peg racking on the back wall with a shelf for standing bottles, plaster to match the hall, sealed low-heat ceiling lights, and a small split system sized for the glass, with its own circuits and a drain.

Project overview

In this example, the owners of a 2000s house want their wine where guests come in. The coat closet off the front hall and the dead space behind it make a room about 4 by 6 ft, too small to walk around in but big enough for a wall of about 200 bottles behind a glass door.

The door is the hard part. A tall glass door lets in far more heat than an insulated wall and has to seal like an outside door, so it is ordered with insulated glass and seals on all four sides, and the cooling is sized for it. Afternoon sun reaches the hall floor in front of the door, and the heat check counts that too.

The goal

The goal is a small cellar off the front hall that keeps about 200 bottles near 55°F behind a glass door, with no fog on the glass and no machine noise in the hall.

Process

  1. Design Closet and the space behind it measured, the door drawn, and a heat-load check for the glass and the sun.
  2. Ordering Steel-framed glass door made to measure, about eight weeks.
  3. Week one Hall closet opened and reframed, wiring and the line set route, then insulation and vapor barrier.
  4. Week two Plaster, pegs, shelf and lights.
  5. Week three Door hung and sealed, split system started and the temperature watched before the bottles go in.

Planning right

  • A tall glass door weighs far more than a wood one. The frame and hinges are chosen for it.
  • Sun on cellar glass adds heat. Note where the light falls at different times of day before choosing the spot.
  • Recessed ceiling lights leak house air into a cellar unless they are sealed fixtures.
  • One glass wall still leaves the other walls and the ceiling to insulate in full.

Request a free quoteMore about glass wine rooms

First cooling for a lower-level cellar in a 1960s house

Example project

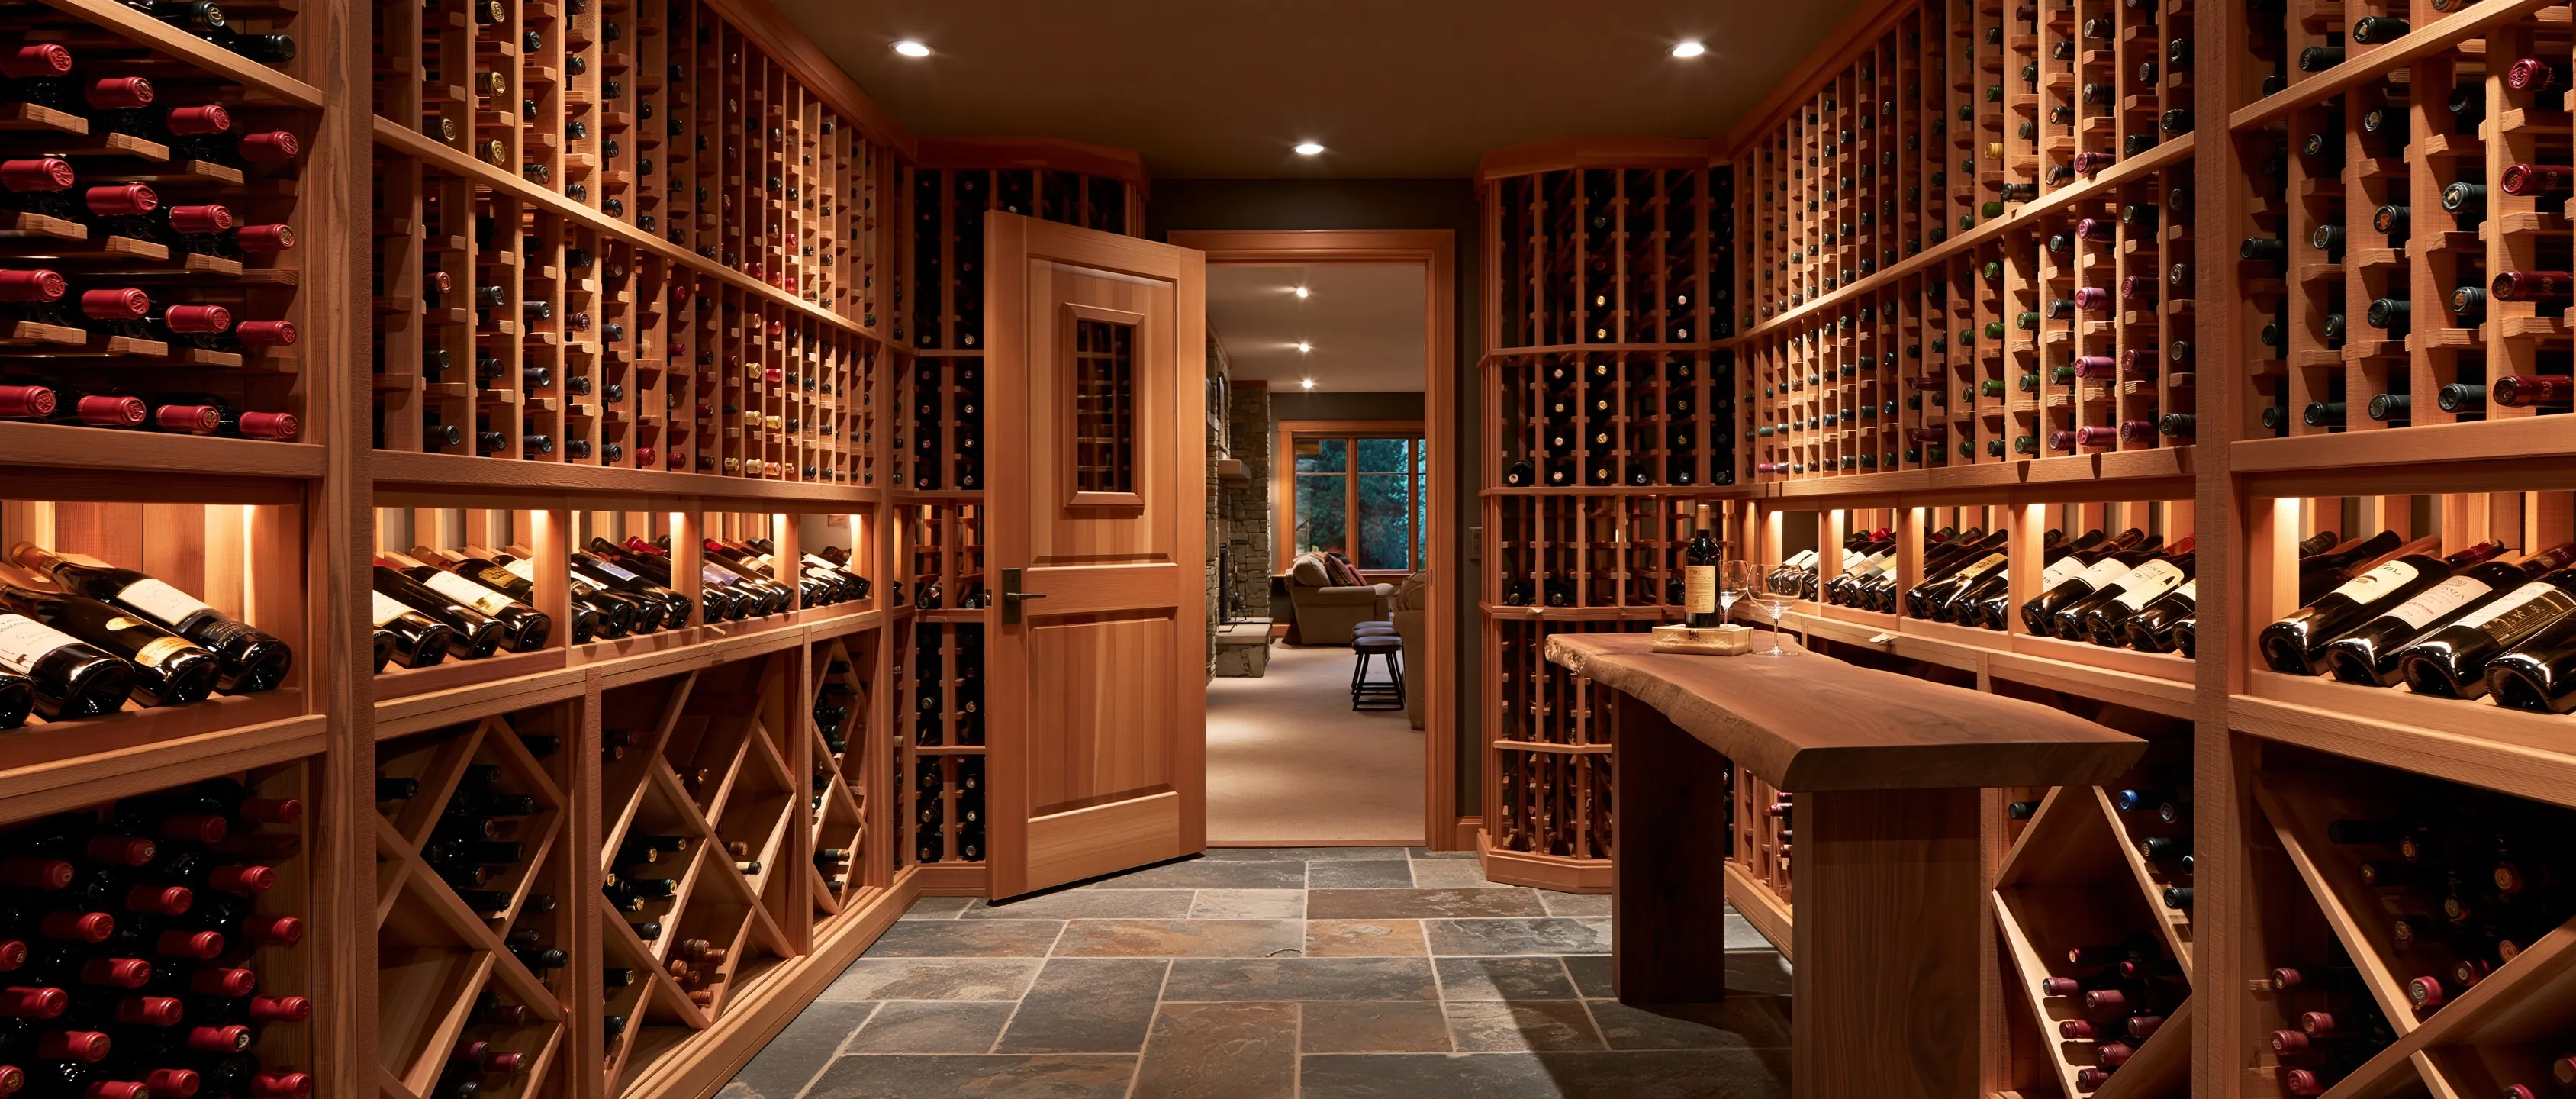
Lower-level cellar with light wood racks and diamond bins on both sides, a plank table down the middle and a stone tile floor
Home
1960s house with a daylight lower floor
Original request
Add cooling to a cellar that an earlier owner built and insulated but never cooled
Space
Walk-in cellar, about 8 by 15 ft, next to the lower-level family room
Starting point
Walls, ceiling and door already insulated and sealed; racks and table stay as they are
Cooling
Ducted split system, with the indoor part in the storage room next door and the outdoor part beside the house
Timeline
Three days on site after a summer of temperature readings
Estimated cost
$10,700

Scope of work

A heat-load check of the room, door seals and gaps checked and fixed, a ducted split system with the indoor part in the storage room next door and short ducts into the cellar, the outdoor part on a pad beside the house, refrigerant lines connected by a certified technician, two circuits, a drain, a wall control, and a start-up check that the room holds about 55°F.

Project overview

In this example, a 1960s house has a lower-level cellar that an earlier owner framed, insulated and sealed but never cooled. It stays cool in winter, but a thermometer left in it through August reads 64 to 66°F, too warm for wine meant to age.

Because the room is already insulated and sealed, the price covers the cooling only. A ducted split system keeps the noise out of the cellar and the family room beside it, with the indoor part in the storage room next door and the outdoor part outside. The door seals are checked before anything is ordered, since a small gap can undo a new system.

The goal

The goal is a lower-level cellar that holds about 55°F through August, with the cooling machinery out of earshot of the family room.

Process

  1. Summer before A high-low thermometer in the cellar through July and August.
  2. First visit Heat-load check, insulation and door seals looked at, routes for the ducts and lines found.
  3. Day one Indoor part set in the storage room and the ducts cut through to the cellar.
  4. Day two Outdoor part placed, and a certified technician joins the refrigerant lines.
  5. Day three Power, drain and the wall control hooked up, then the first run.
  6. Following weeks Readings taken again after the room settles.

Planning right

  • Measure first. A lower-level room that stays near 55°F through August may not need cooling at all.
  • If the room is not insulated and sealed, that work comes first and is priced as a cellar build, not as cooling.
  • Slope the drain line away from the racks and test it before the indoor part is closed in.
  • Check the door sweep and weatherstripping every year. Worn seals make any unit run longer.

Request a free quoteMore about wine cellar cooling systems

Cellar on view under a 1970s entry stair

Example project

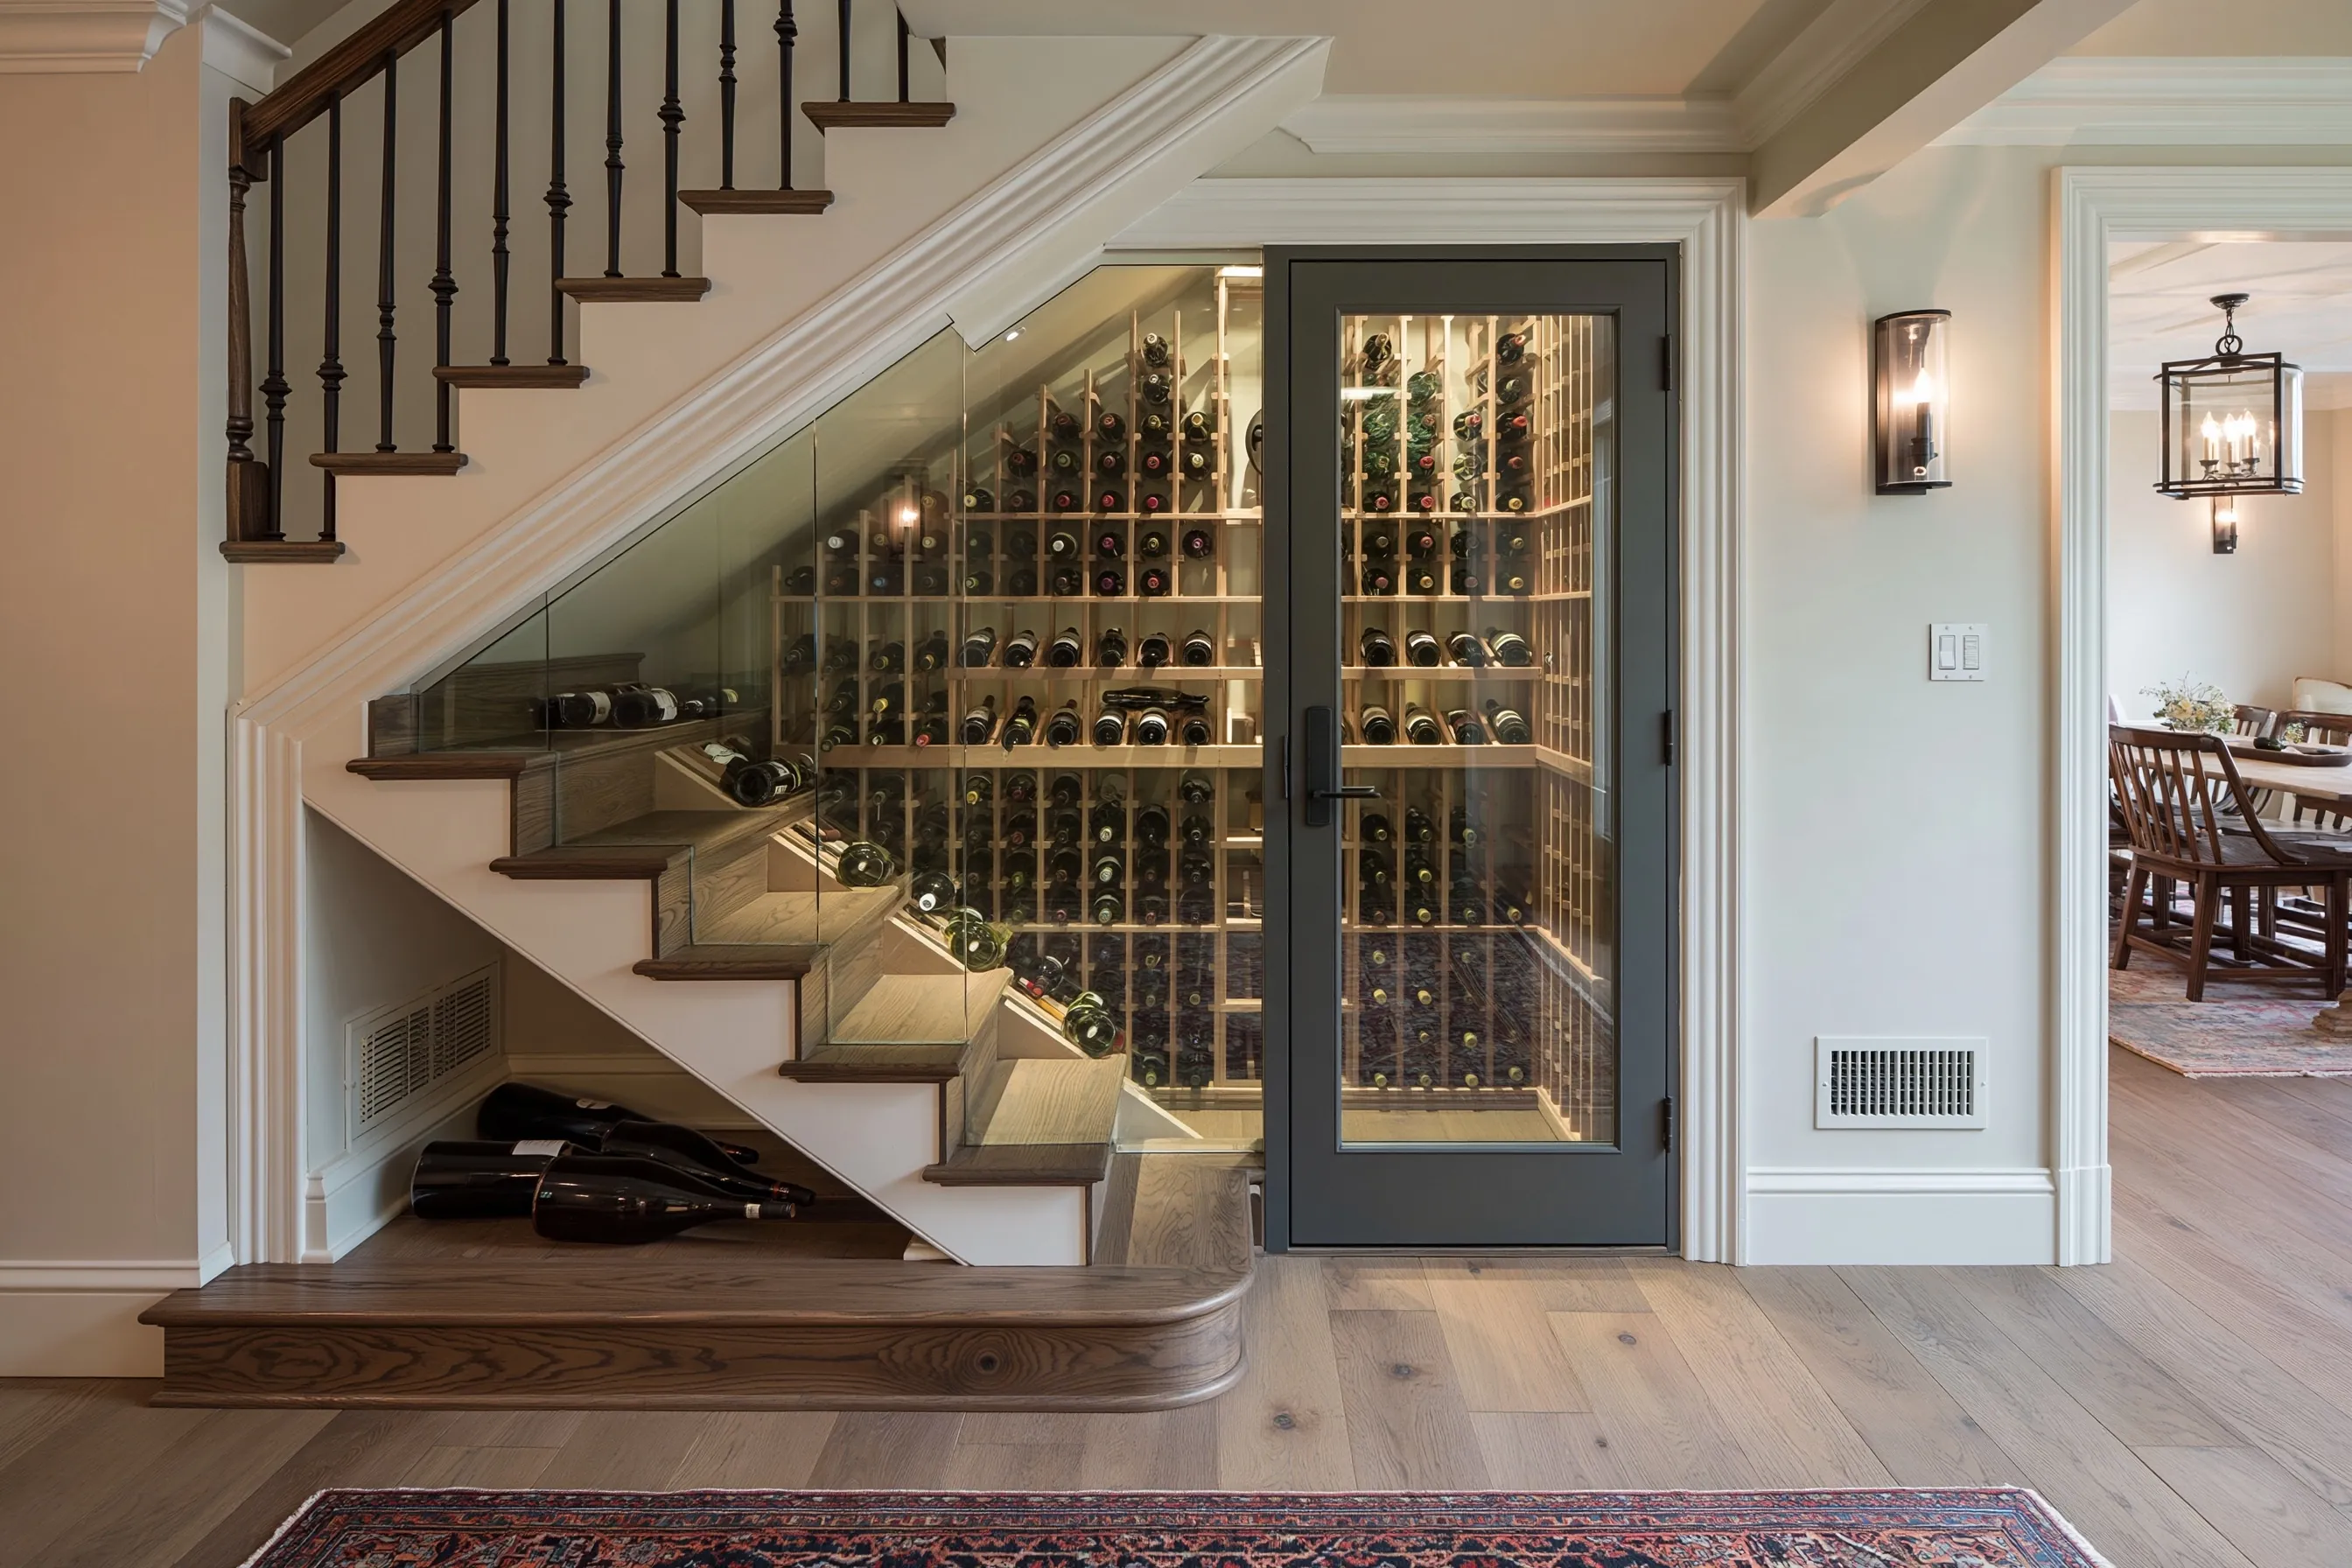
Glass panels following a painted stair with iron balusters, wood wine racks stepping up behind them and a dark-framed glass door at the tall end
Home
1970s two-story house
Original request
Turn the coat closet under the stair from the entry hall into a cellar on view
Space
Closet under the stair up to the second floor, about 8 ft long, with a sloped ceiling
Design
Insulated glass panels cut to the line of the stair, a dark-framed glass door at the tall end, wood racks with single slots stepping up with the stair
Capacity
About 240 bottles
Cooling
Small through-the-wall unit behind a grille in the low end wall, venting into the entry hall and the dining room beyond
Timeline
Two weeks on site once the glass arrives, about five weeks after the design is agreed
Estimated cost
$19,800

Scope of work

The closet's shelf and hollow door out, the stair underside and the walls insulated and sealed, a vapor barrier on the warm side, insulated glass panels cut to the stair line with a framed glass door, wood racking with single slots stepped to the slope, a low-heat light, and a through-the-wall unit in the low end wall on its own circuit with a drain.

Project overview

In this example, a 1970s two-story house has a coat closet under the stair that rises from the entry hall to the second floor. It holds coats and a vacuum cleaner, and the owners would rather see about 240 bottles there as they come in the front door.

The closet wall becomes glass panels that follow the stair, with a glass door at the tall end, so the cellar is on view from the hall. The stair above becomes the ceiling, insulated and sealed like any other wall, gaps around the treads included. The hall opens into the dining room, so a small through-the-wall unit in the low end wall has a large space to send its warm air into.

The goal

The goal is a glass-fronted cellar under the stair that holds about 240 bottles near 55°F and turns a coat closet into something worth looking at.

Process

  1. Design Stair measured, racks drawn to the slope, and a heat-load check for the glass.
  2. Ordering Glass panels and door cut to fit the stair, about four weeks.
  3. Week one Closet cleared, stair underside and walls insulated and sealed, wiring and the opening for the unit.
  4. Week two Racks and light in, glass panels and door set, then the unit runs a few days before any bottles arrive.

Planning right

  • Treads and risers leak air. Seal the underside of the stair, not only the walls.
  • Glass that follows a stair is cut panel by panel, so it is ordered only after the stair trim is on.
  • A through-the-wall unit only suits a stair with a large, open space on the unit's warm side.
  • Keep the grille in front of the unit clear of coats, shoes and furniture.

Request a free quoteMore about under-stair wine cellars

More wine cellar designs

Concept images of cellar rooms, closets, glass fronts and racking, for picking a style before we see your house.

Basement and walk-in cellars

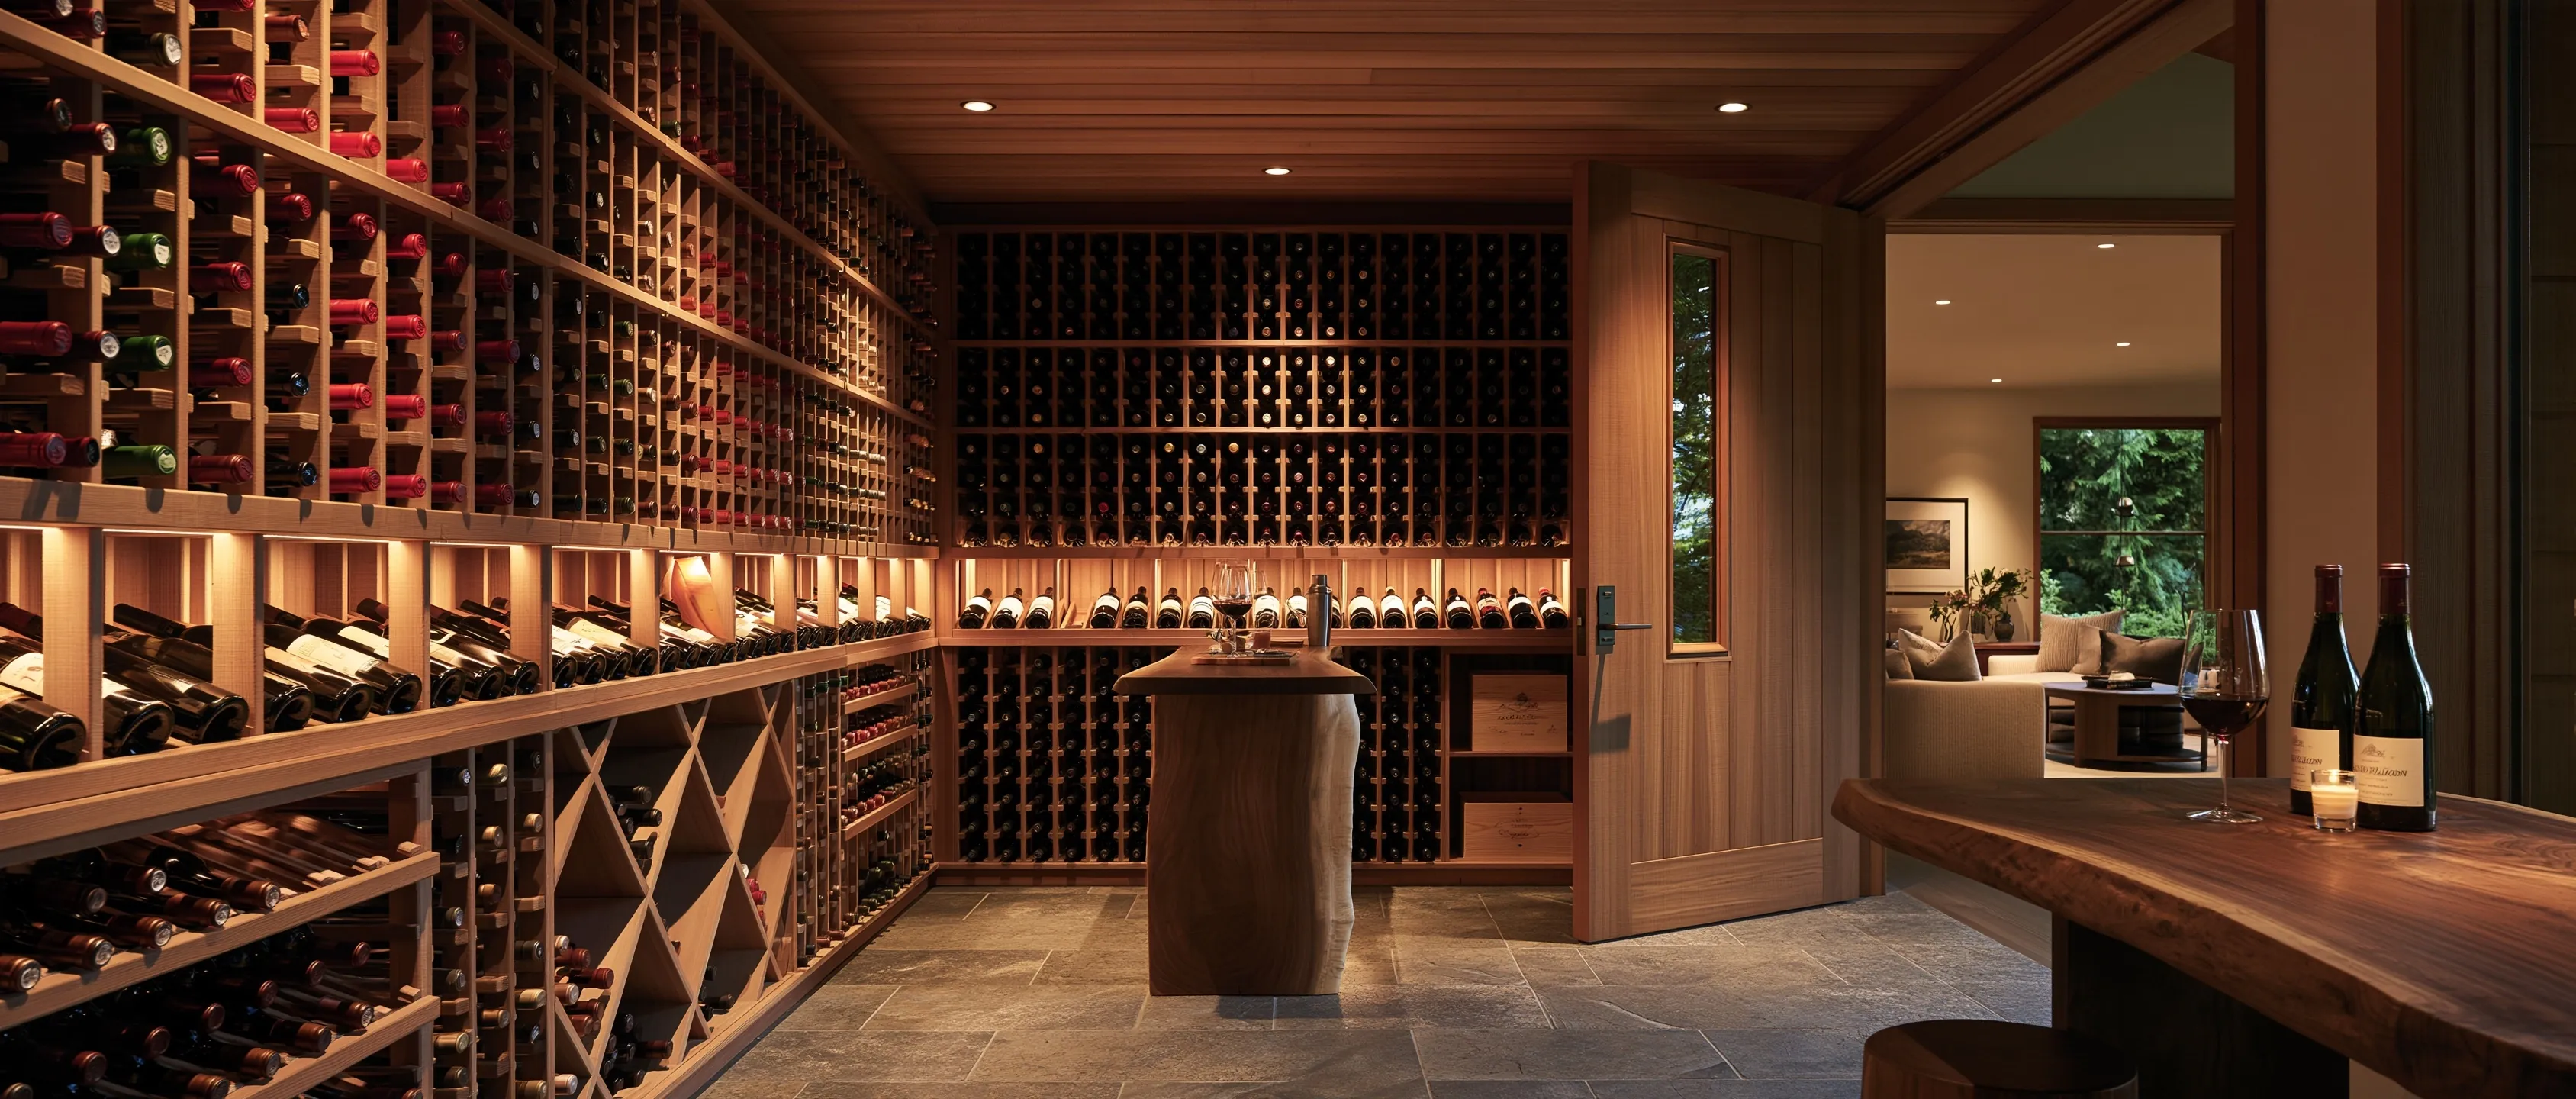
Walk-in wine cellar with floor-to-ceiling light wood racking, diamond bins, a slate tile floor and a live-edge walnut counter, its wood door open to a family room
Lower-level walk-in with individual slots, diamond bins and a live-edge counter
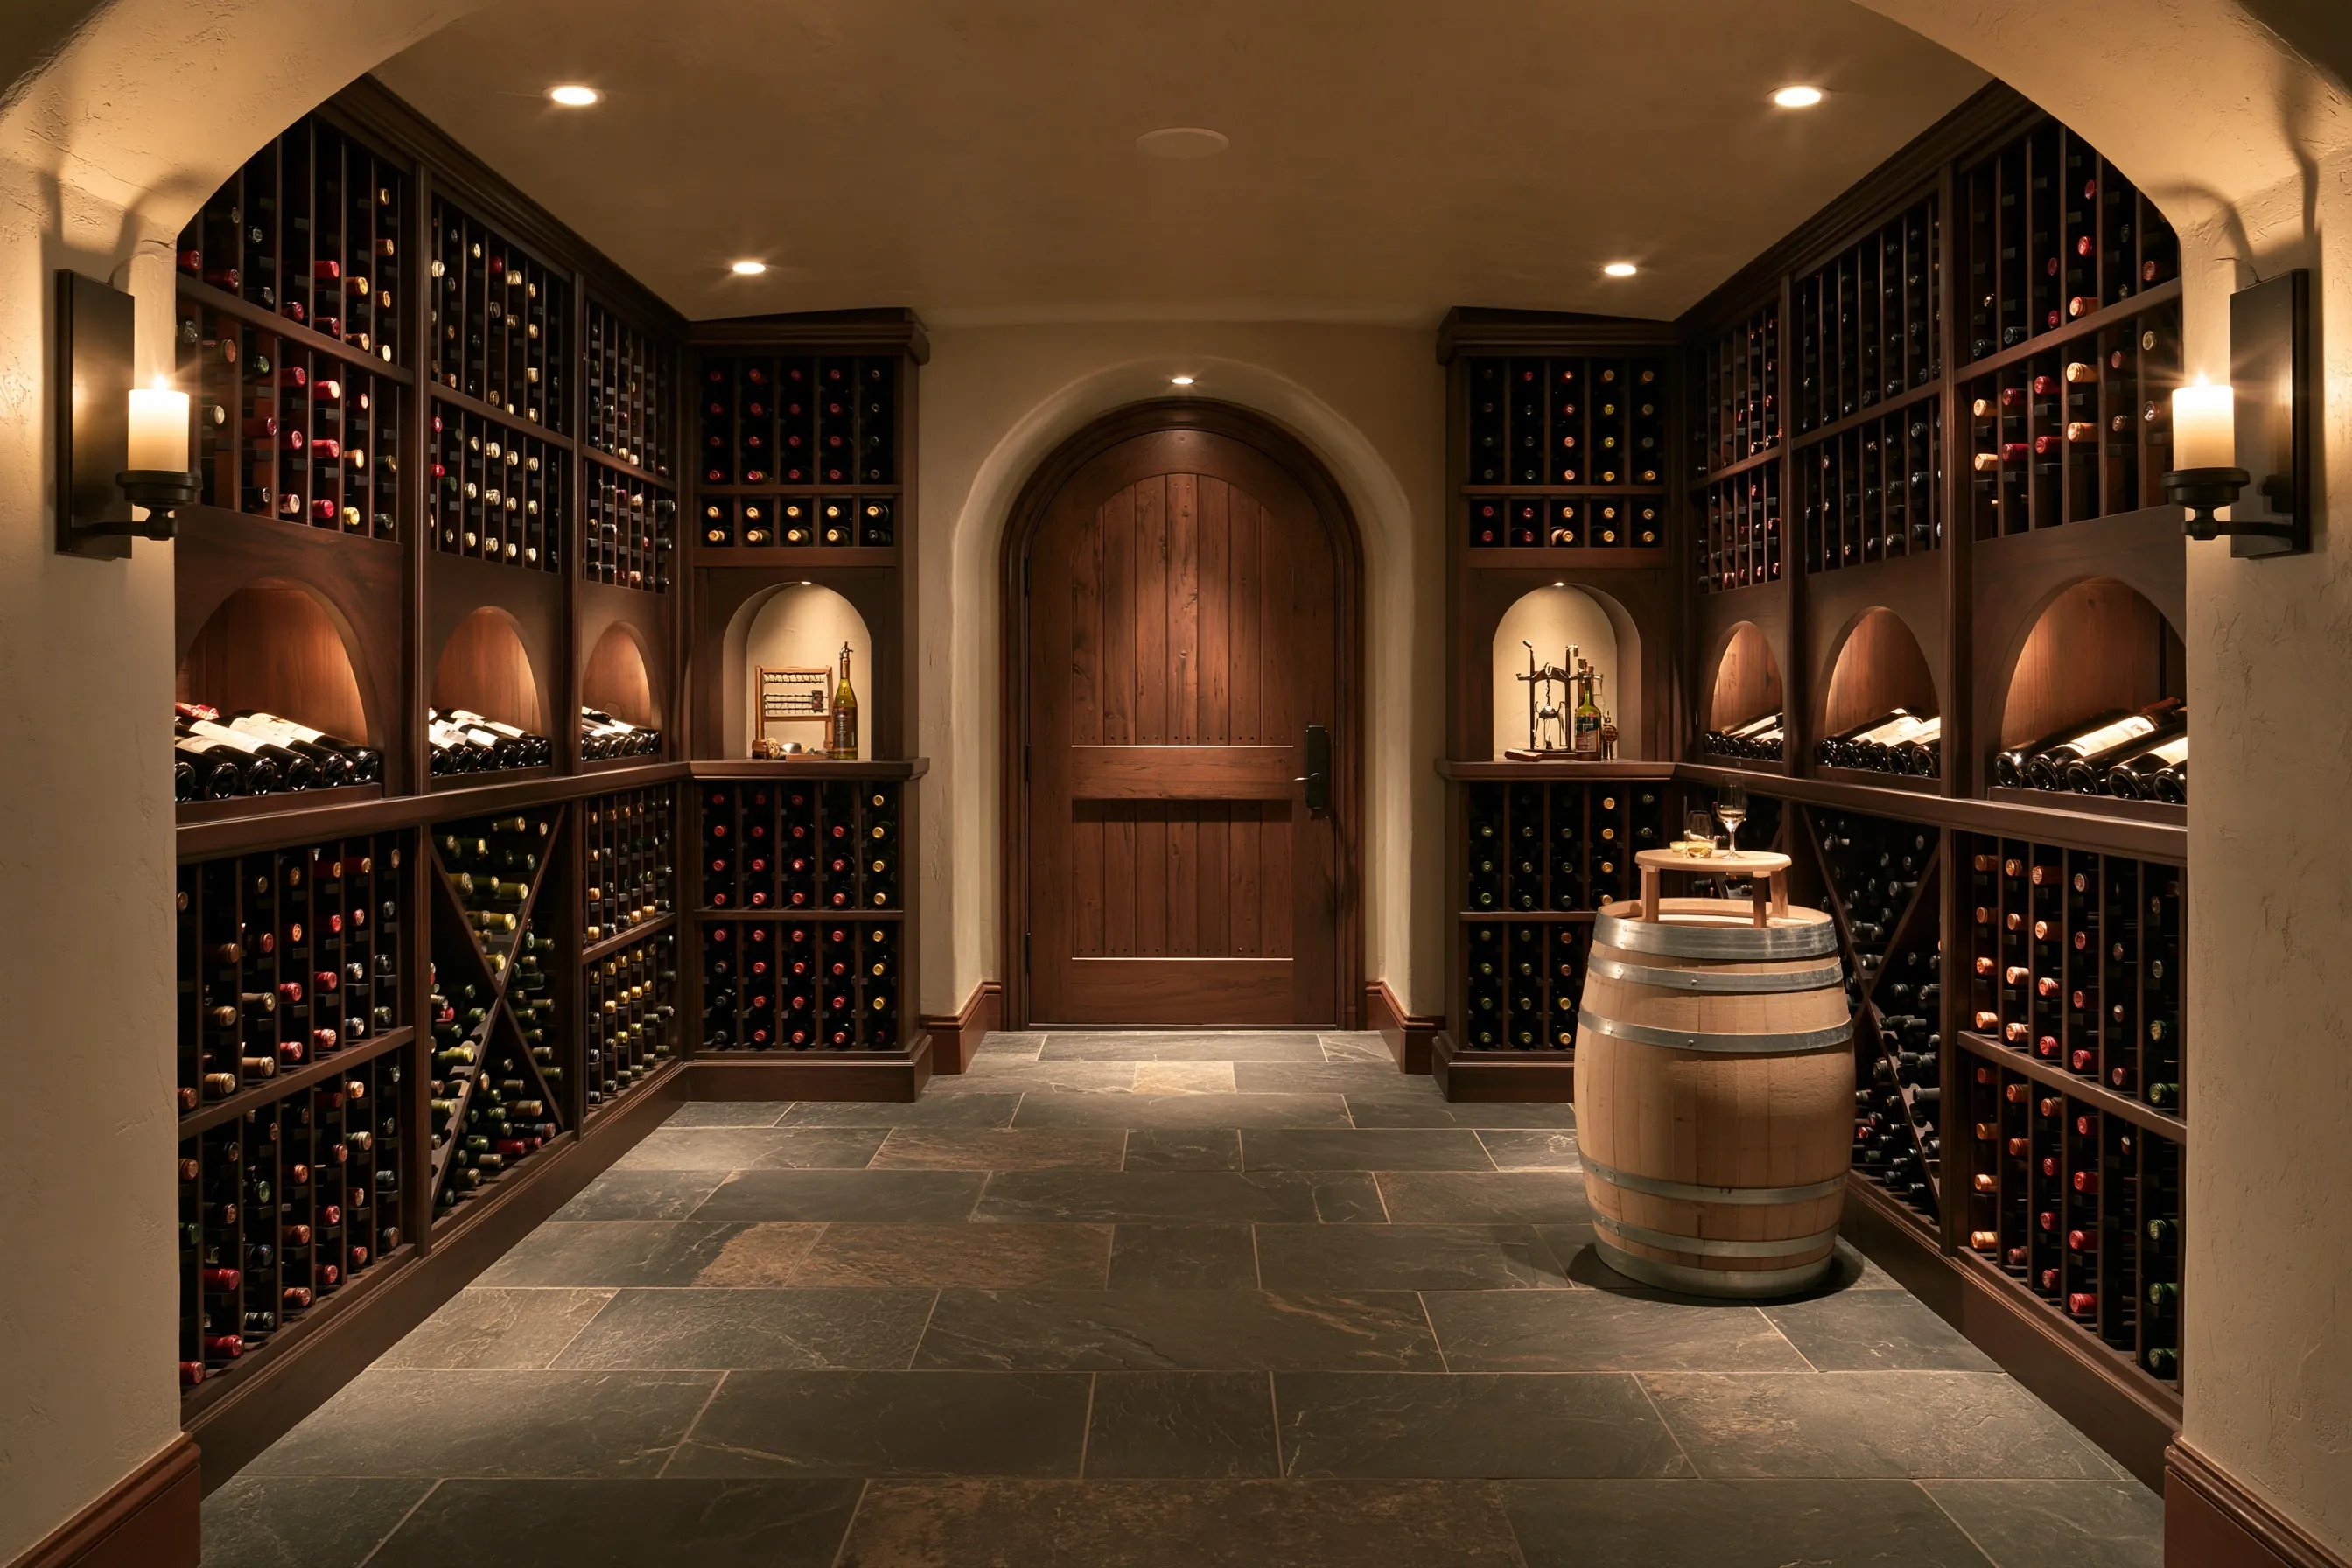
Basement cellar with dark-stained racking and arched niches along both sides, a slate floor, an arched plank door and an oak barrel table
Basement room with arched niches, slate floor and a heavy plank door

Closets and under-stair conversions

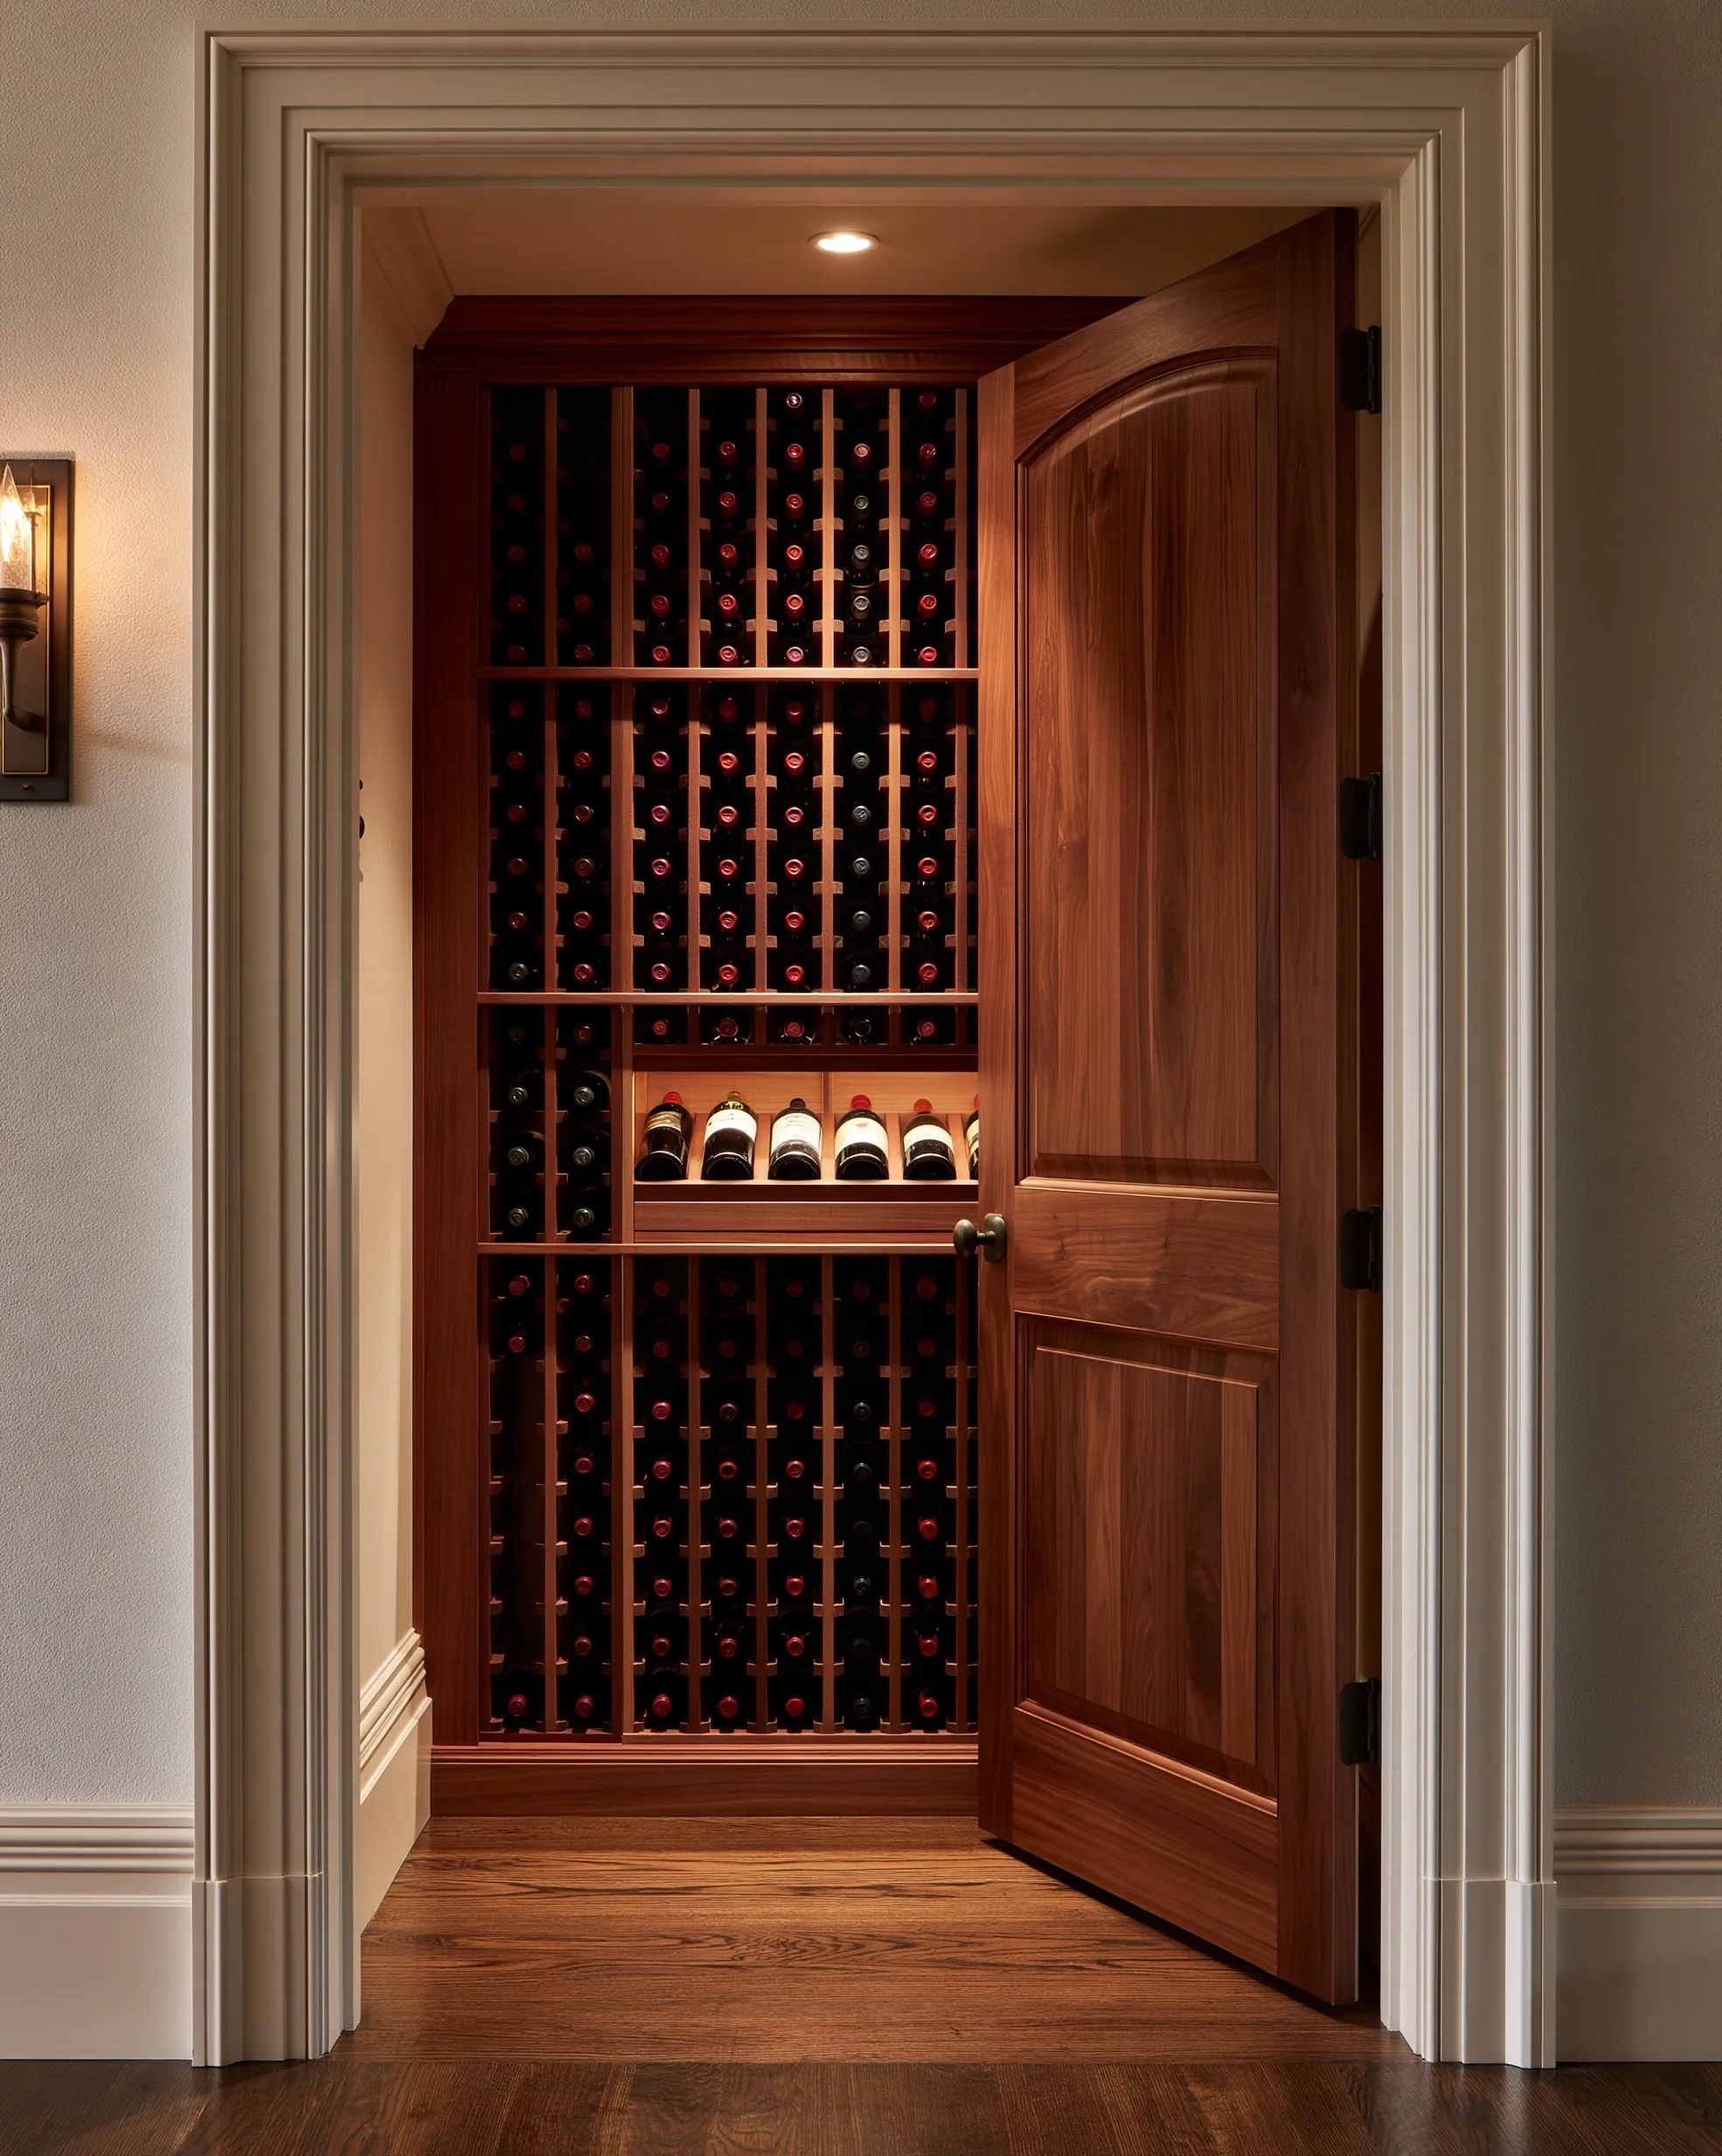
Reach-in hallway closet fitted with floor-to-ceiling individual-bottle racking and a display shelf, its paneled wood door open
Reach-in closet with full-height racking and a display shelf
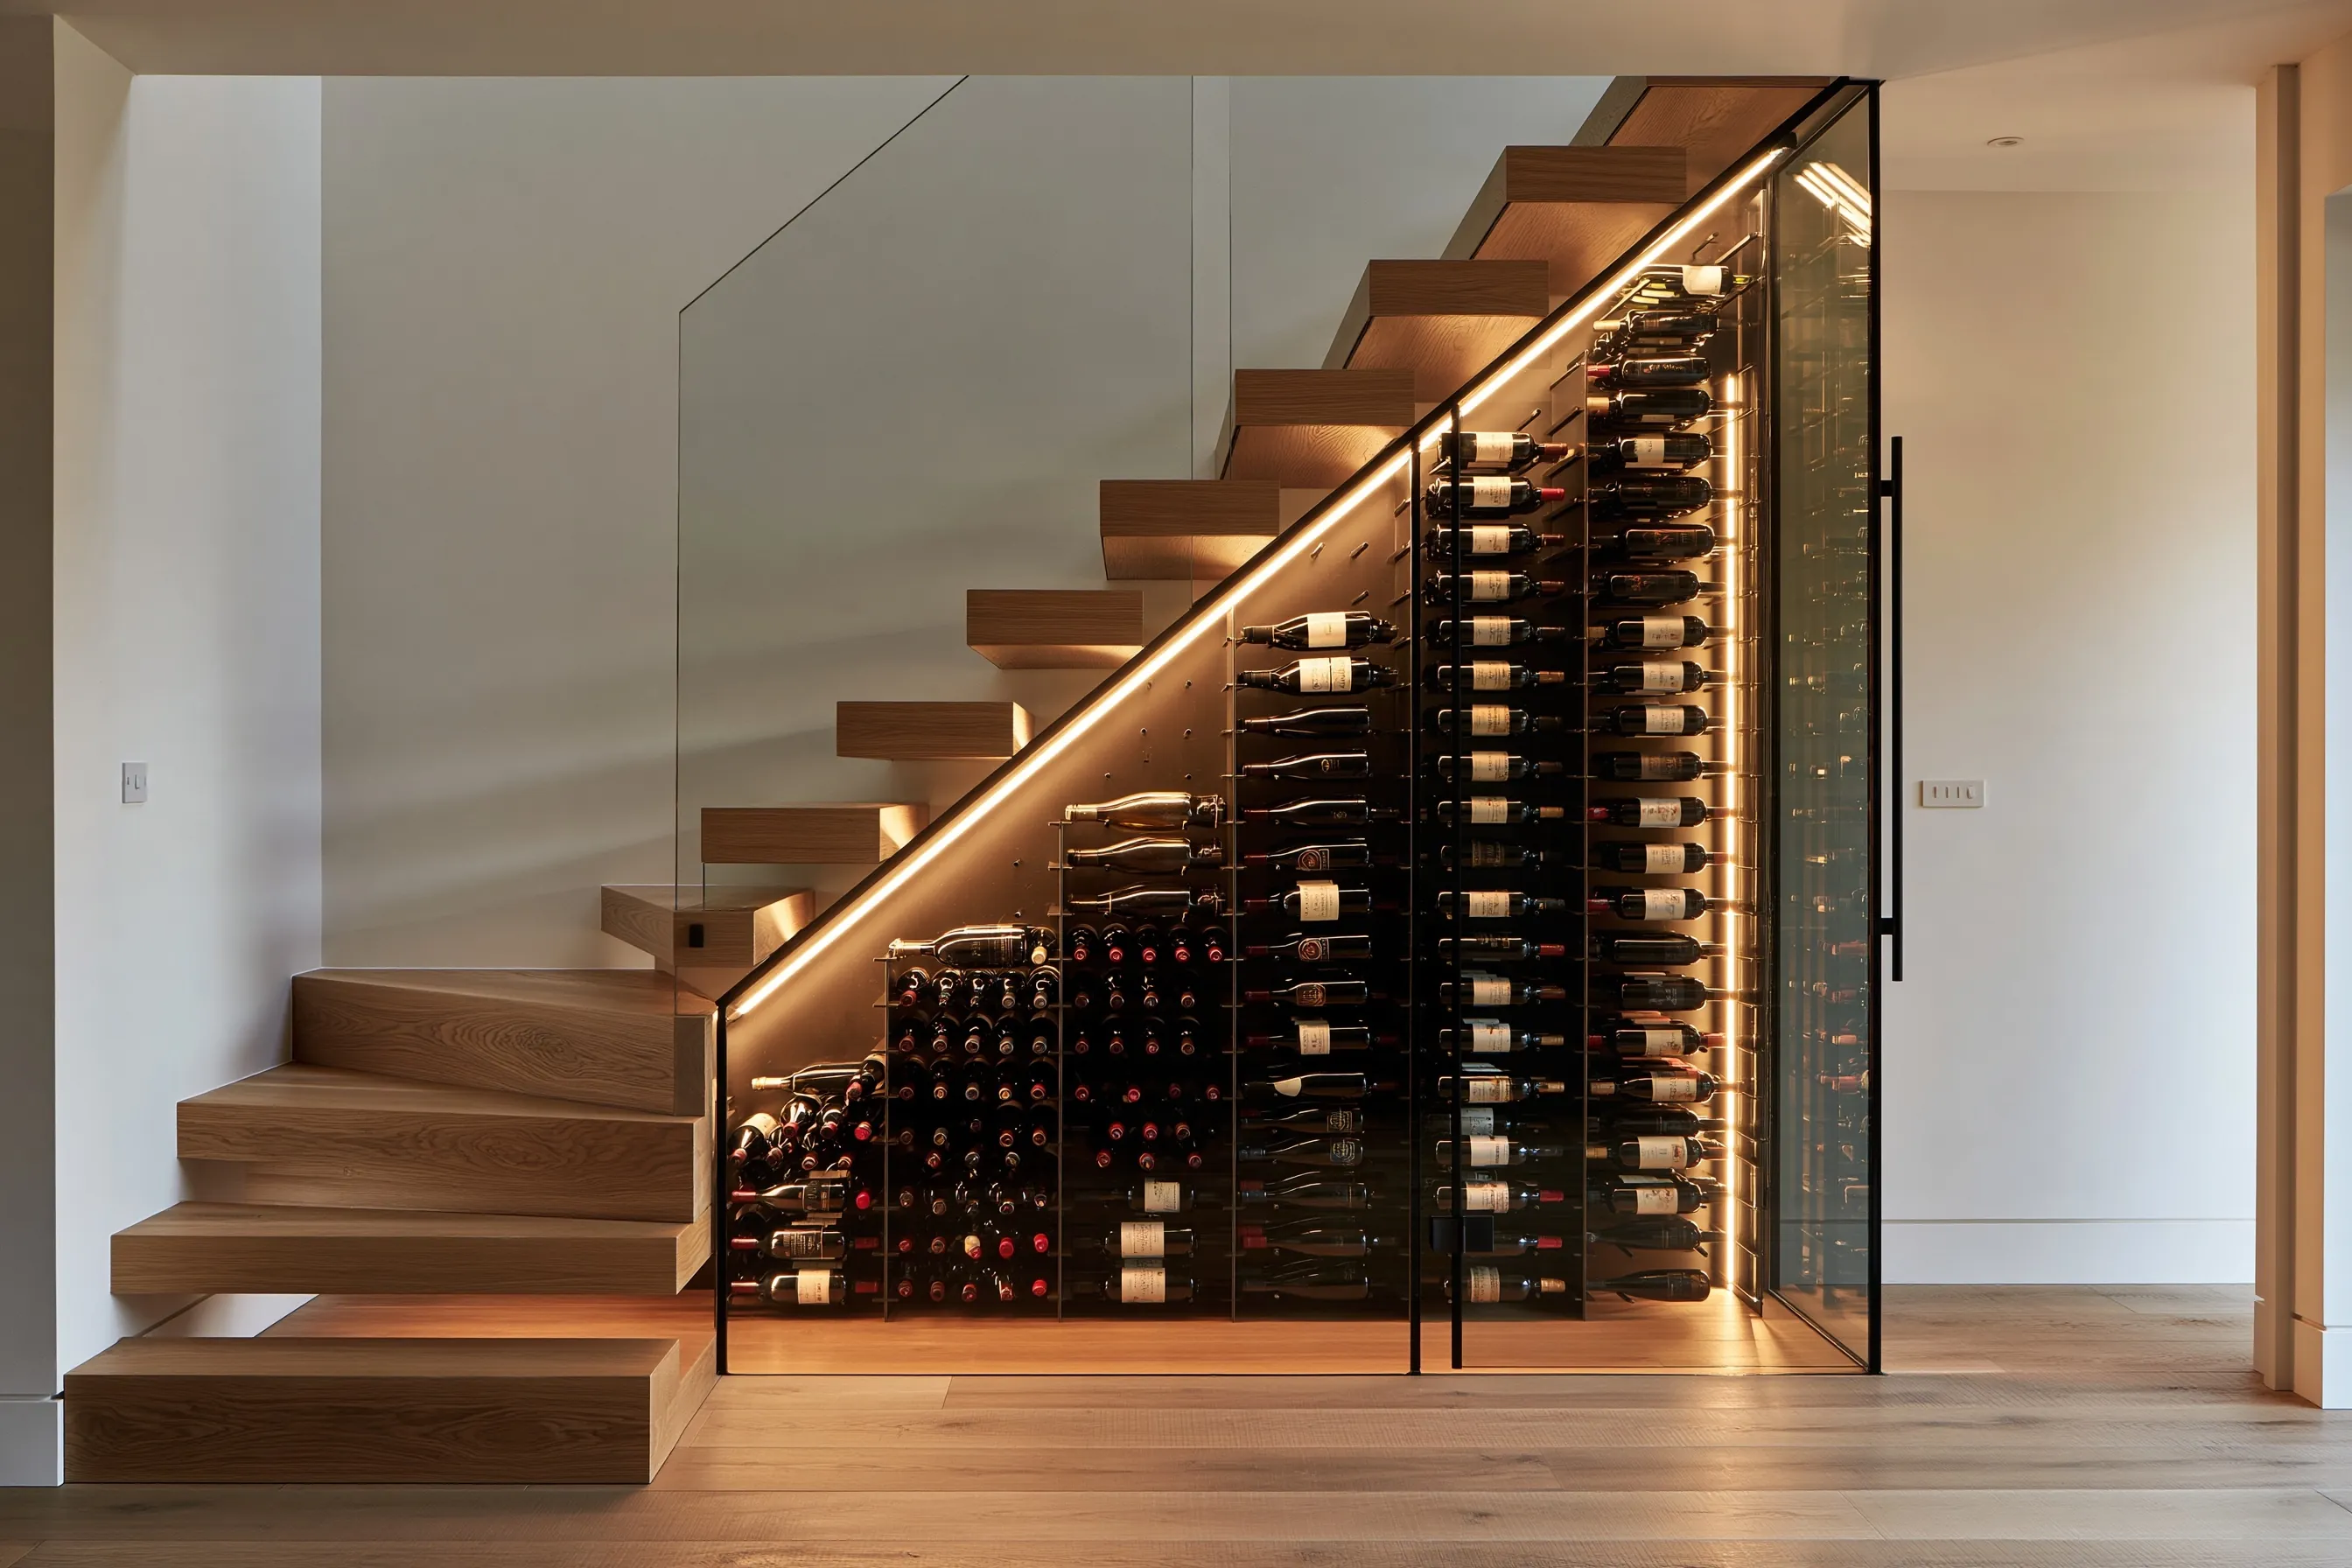
Glass enclosure under a floating oak staircase, metal peg racking stepping down beneath the slope and LED strips along the stringer
Under-stair glass enclosure with racking that follows the slope

Glass, walls and cooling

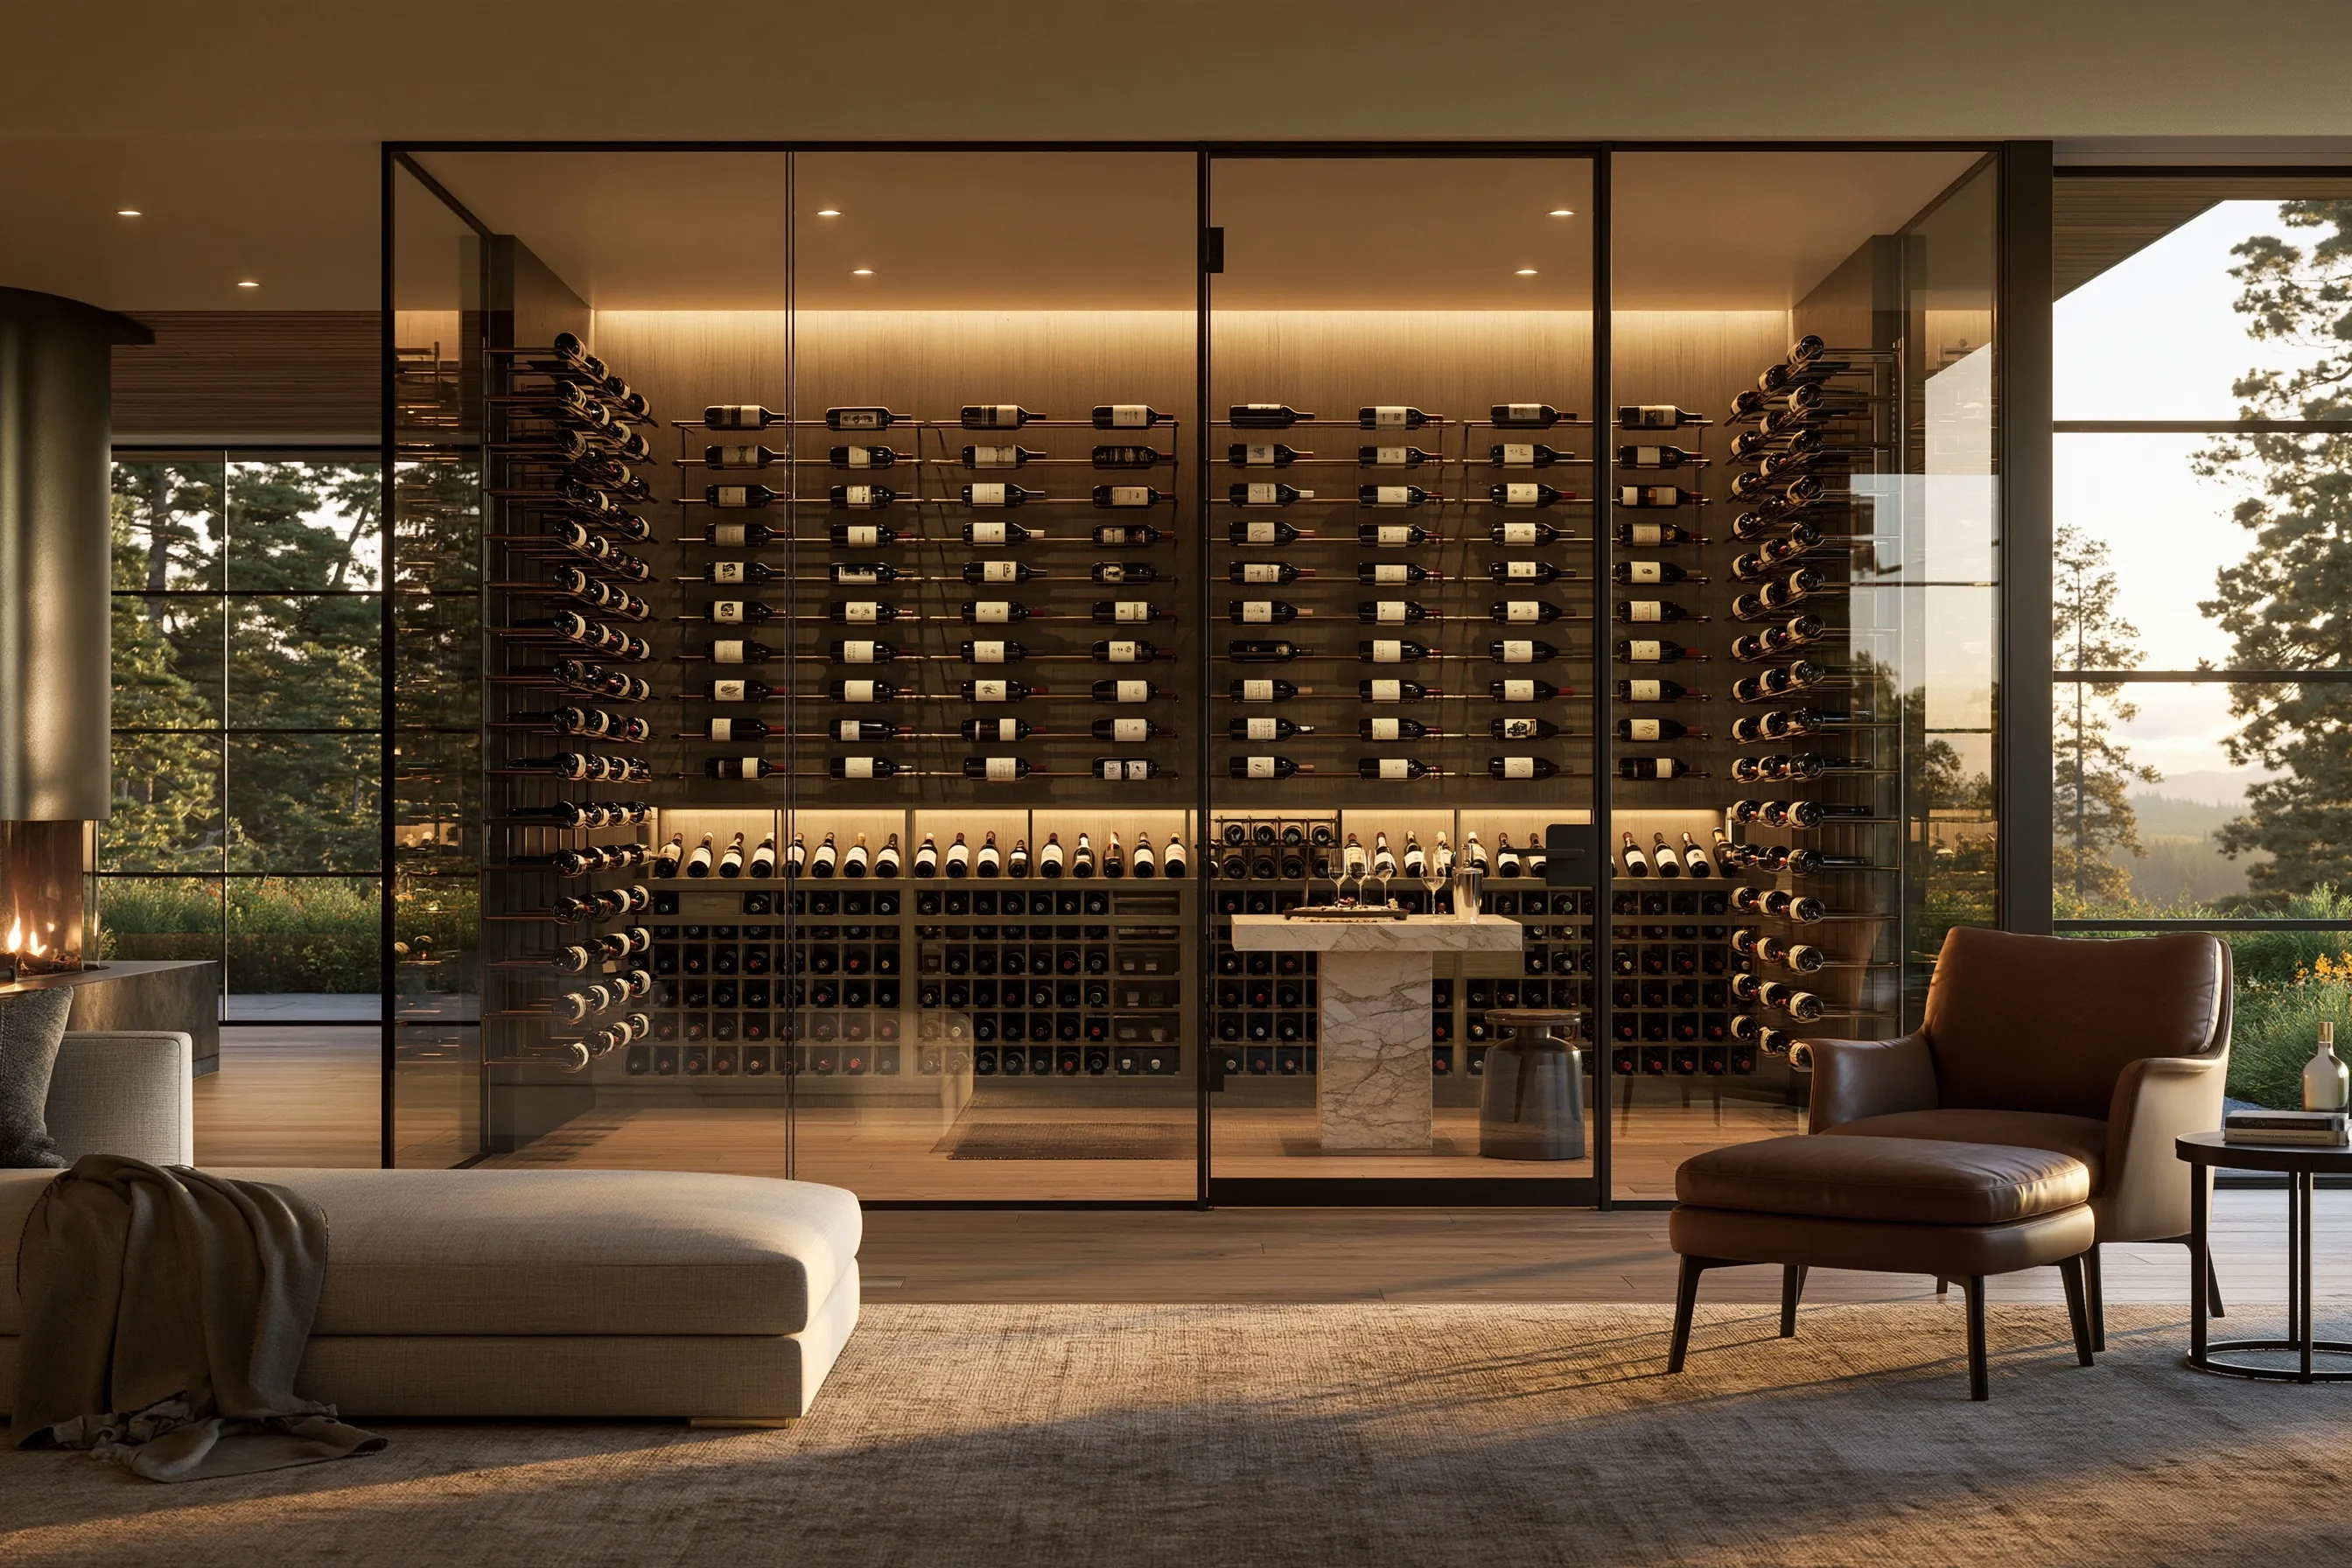
Steel-framed glass wine room in a living room, bottles held on metal rods along the walls, a marble pedestal table inside and a leather armchair in front
Glass room with label-forward metal rods and a marble tasting table
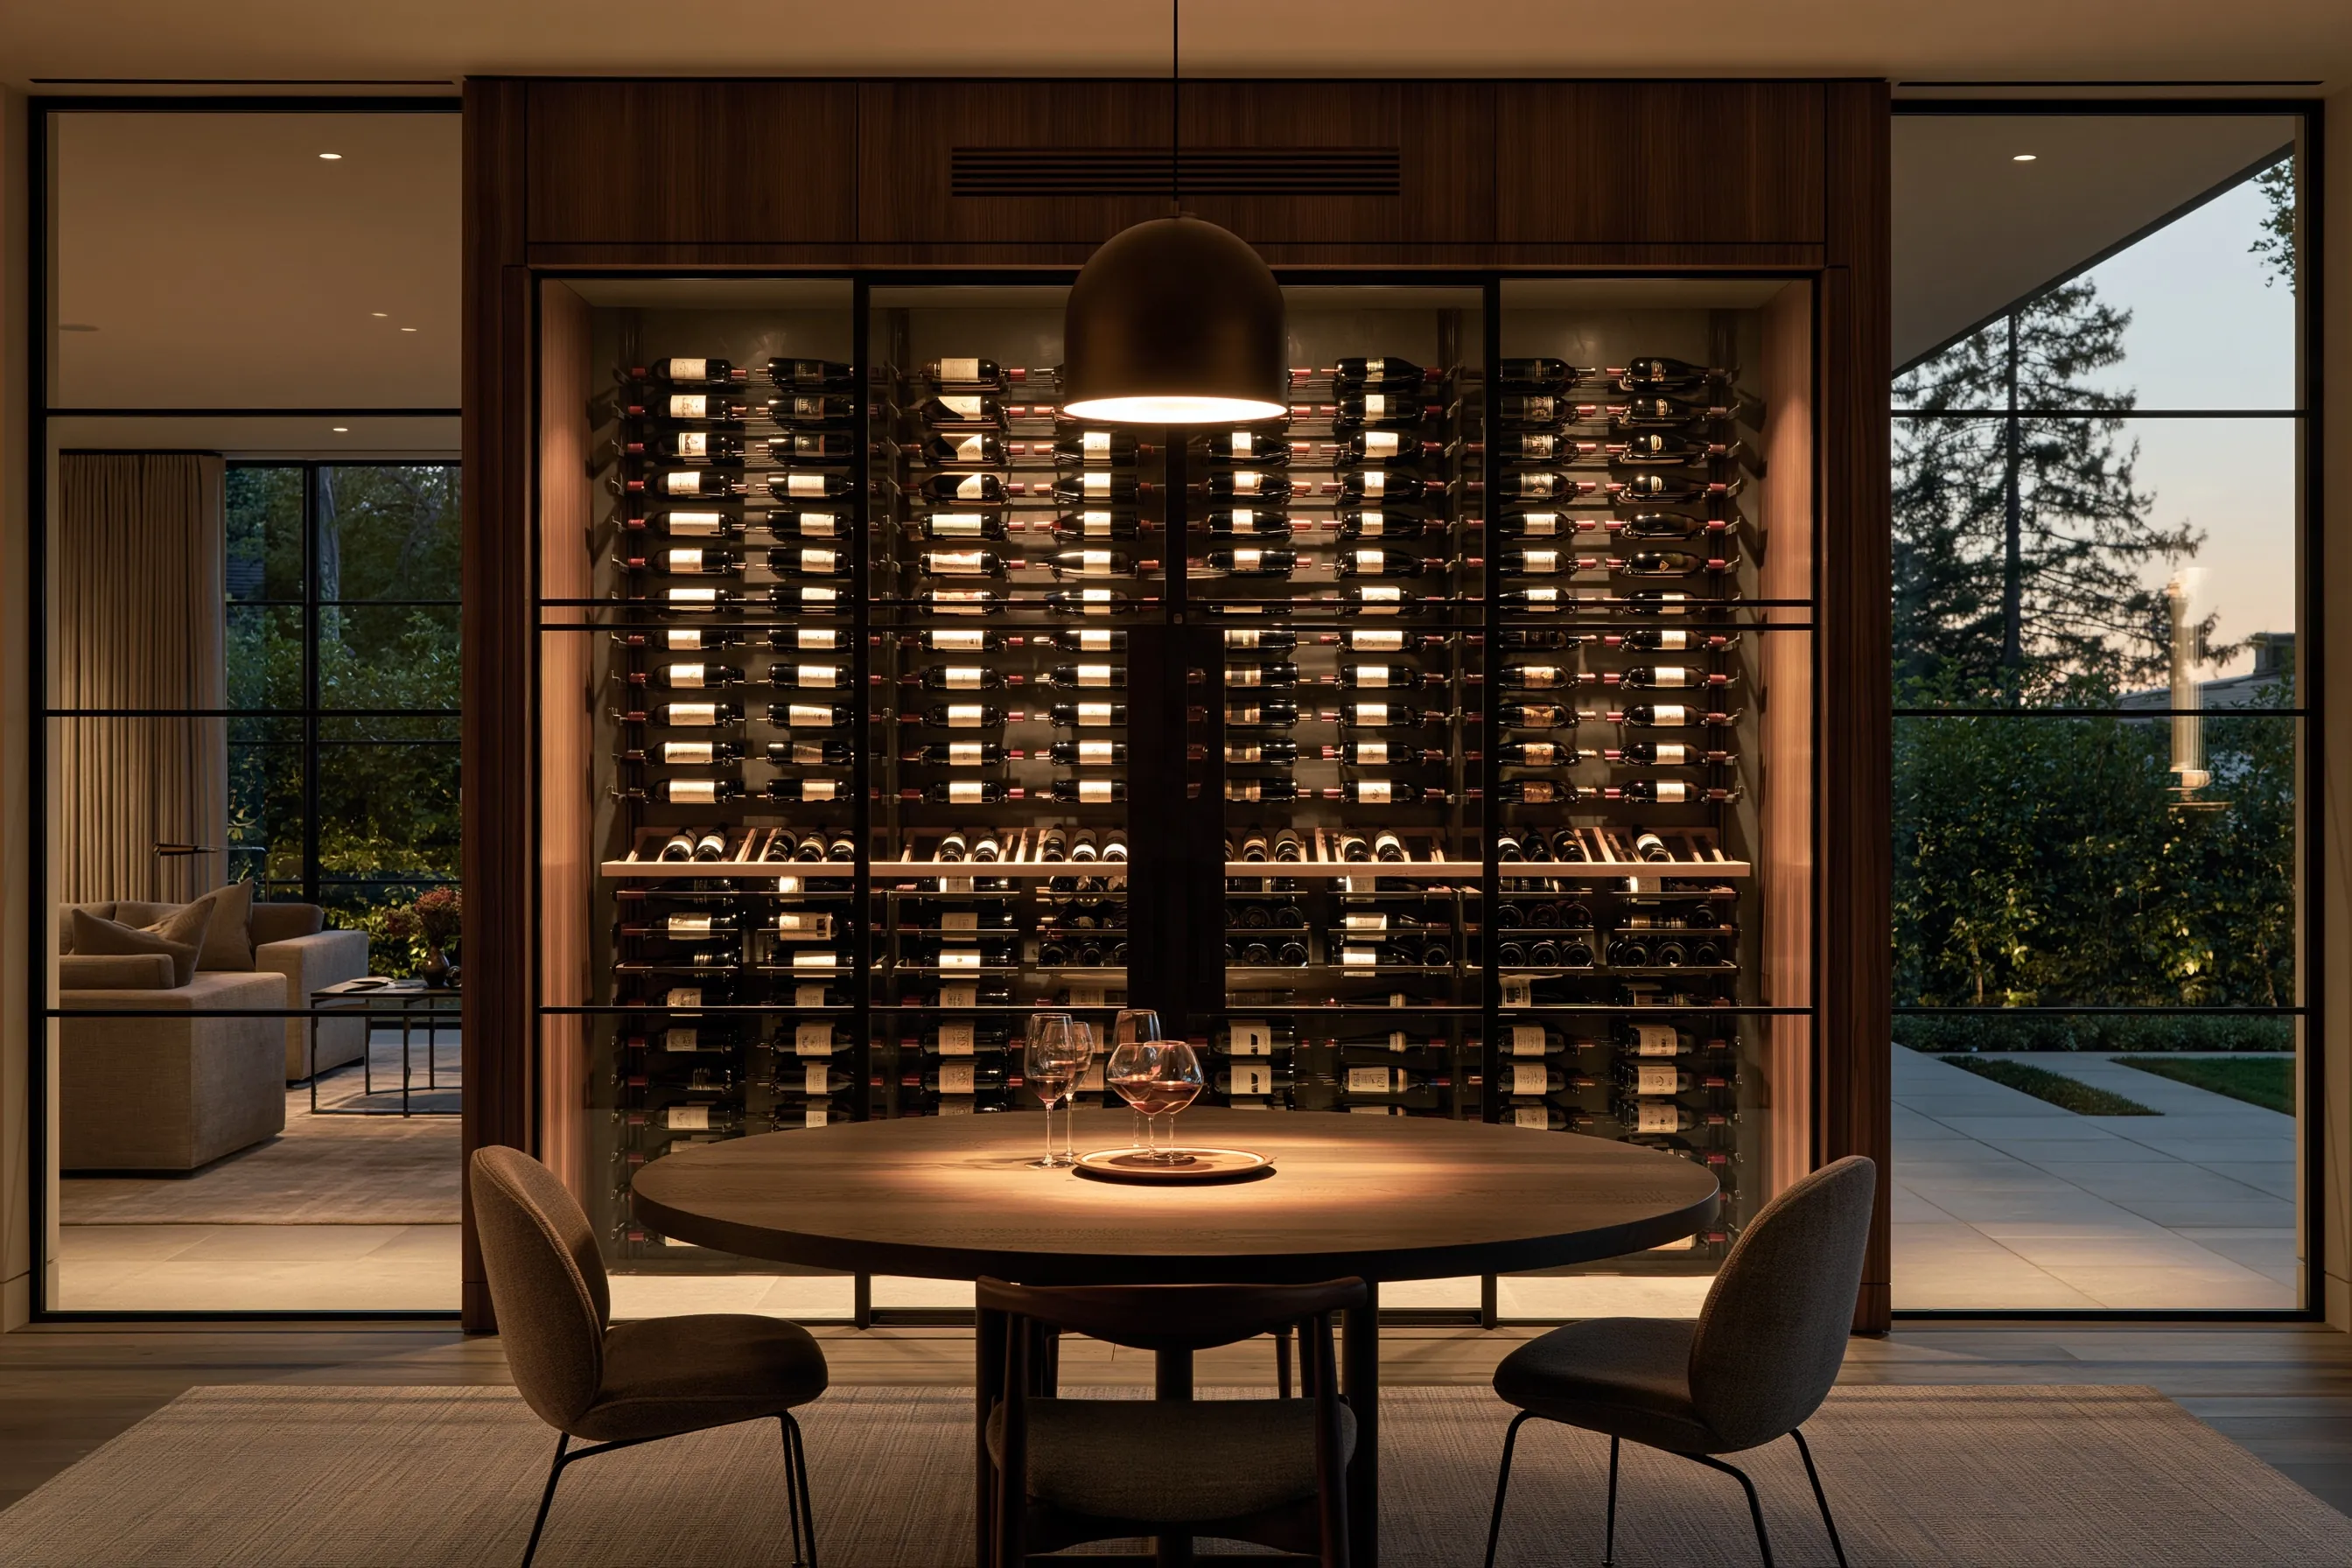
Dining-room wine wall behind steel-framed glass, bottles on wood and metal racking inside a walnut surround with a linear grille above
Dining-room wine wall with a grille built into the walnut surround
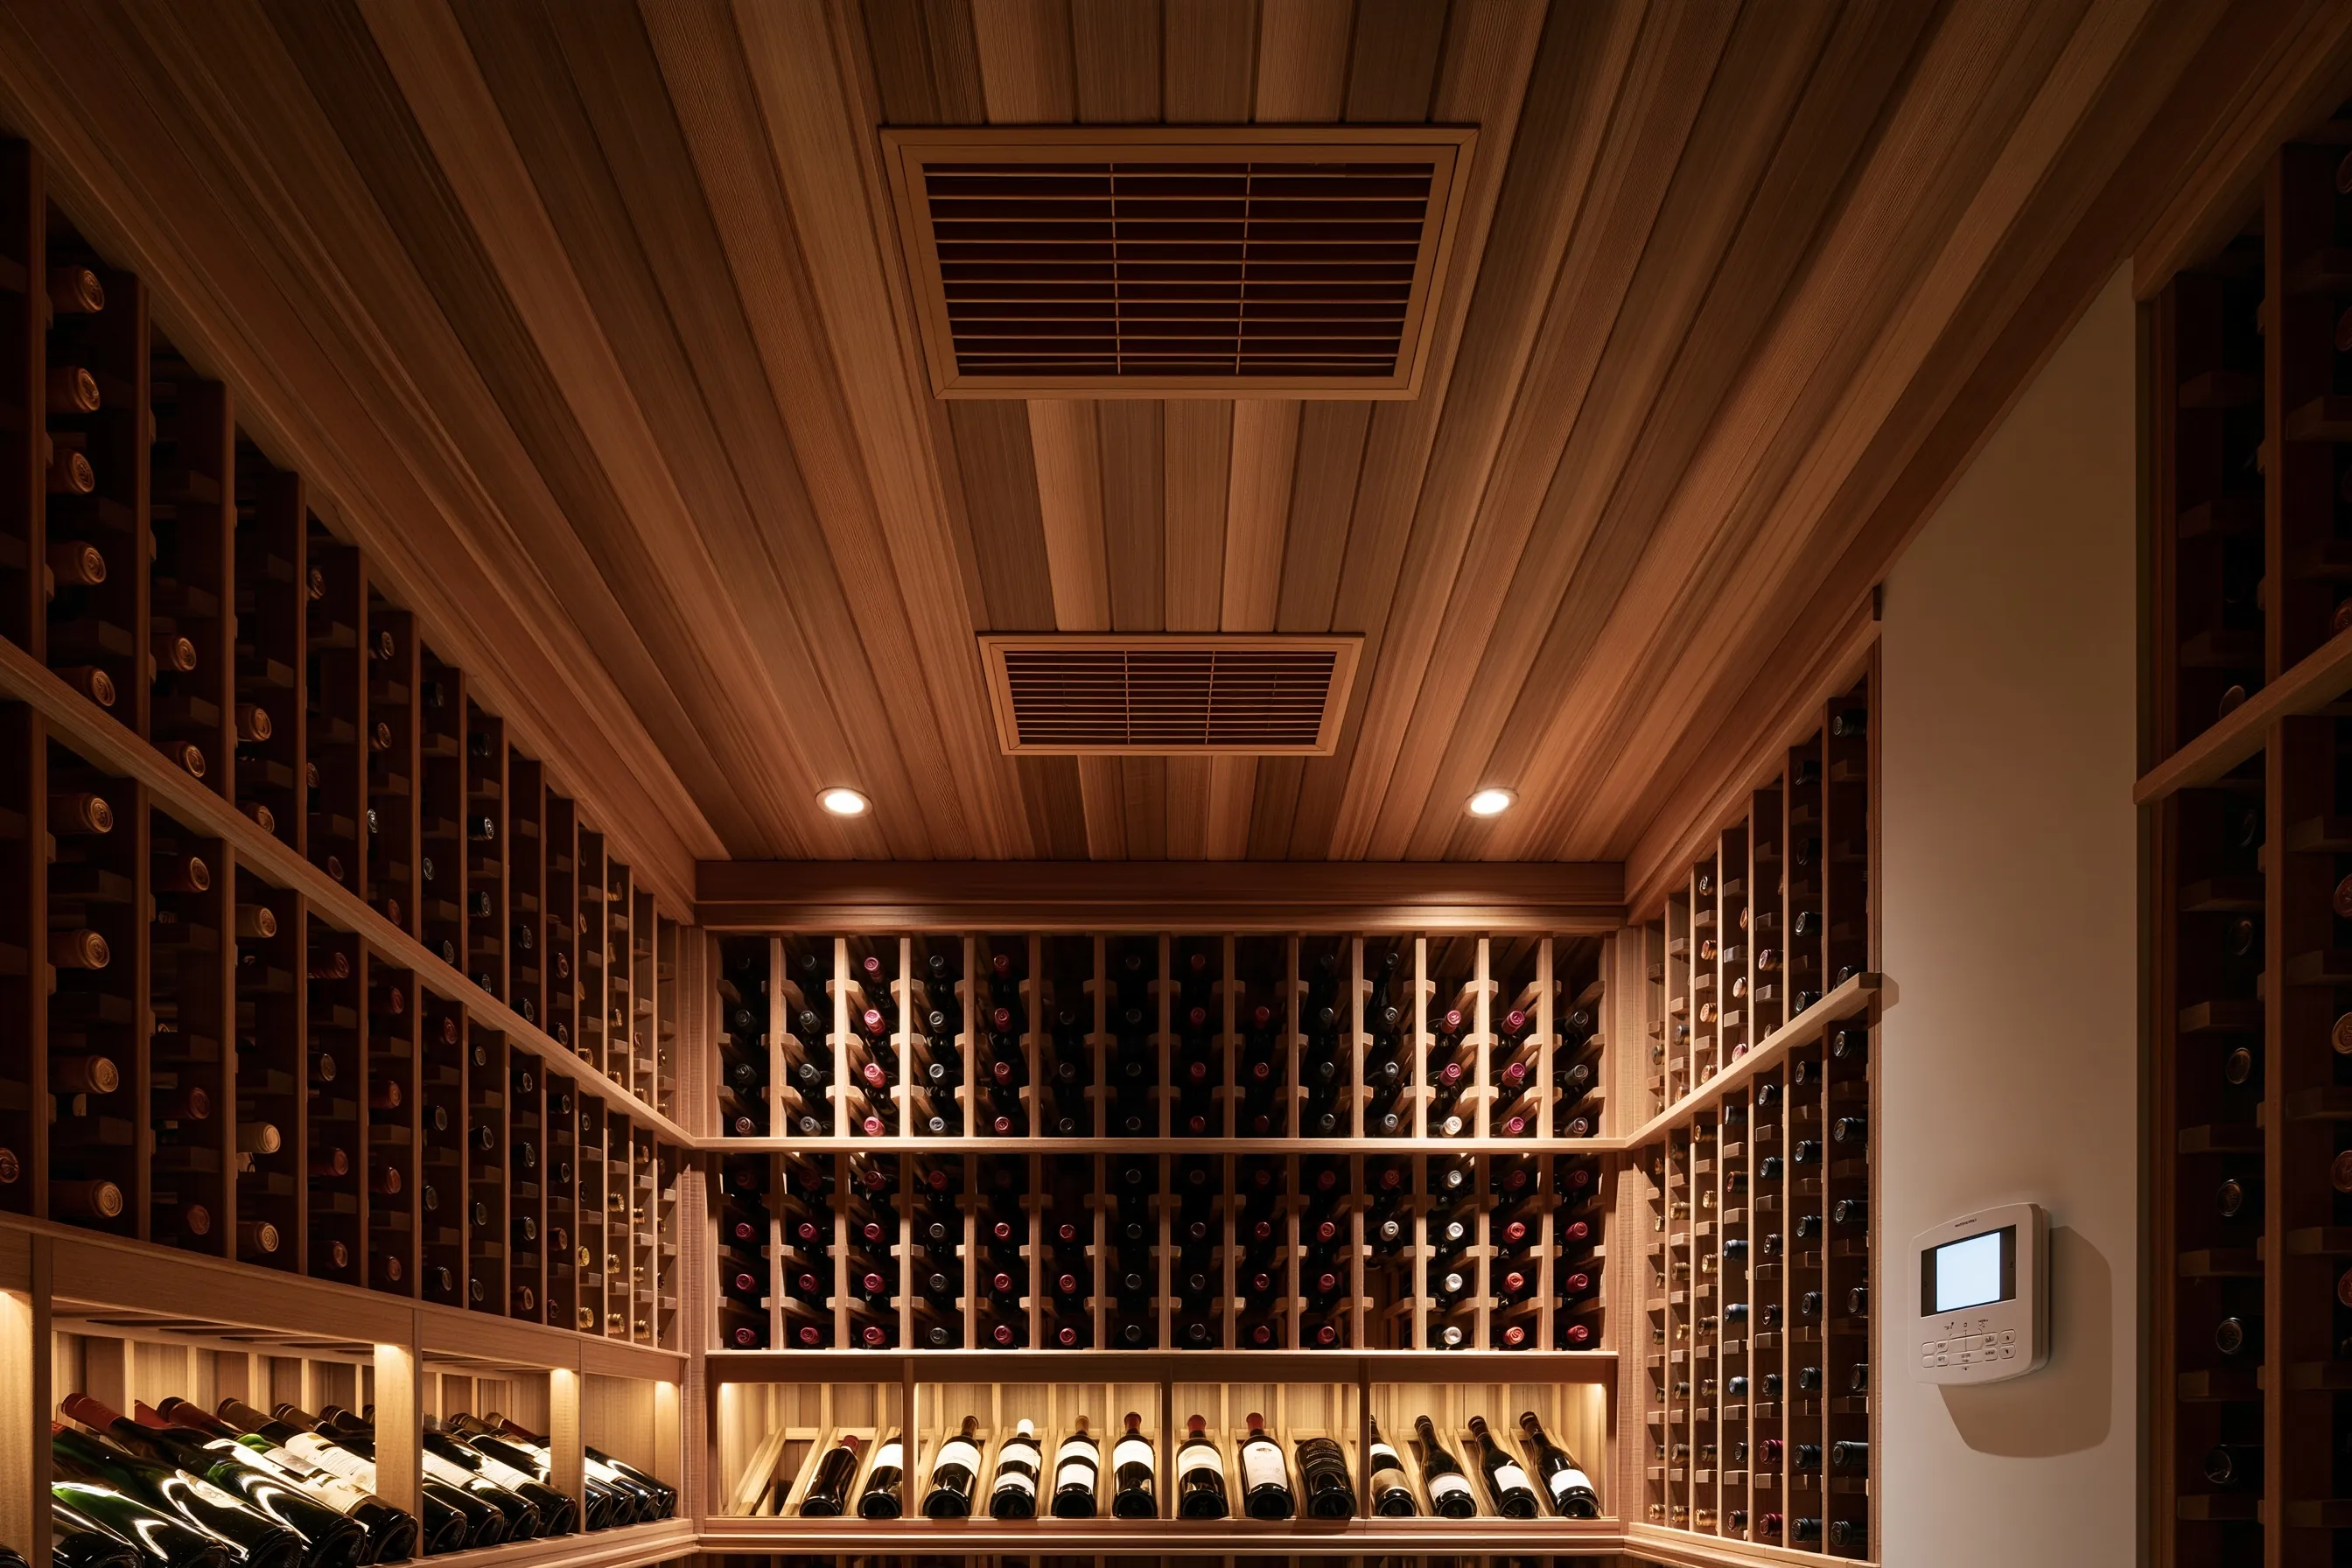
Tongue-and-groove wood cellar ceiling with two rectangular supply and return grilles above wood racking, and a wall controller with a blank screen
Ducted cooling grilles set into a tongue-and-groove ceiling

Request a free wine cellar quote

Tell us which example comes closest, which room or space you have in mind and roughly how many bottles you keep. We'll get back to you soon with an estimate or any questions we have. Estimates are free and there's no obligation.

Call (971) 265-8177

Call (971) 265-8177